Friday, February 20, 2015

CHALLENGE #3: Stamp On Felt

CARD# HPJ-2015-03: A Little Bird

Hi guys and gals! Here’s the third card in the series. The challenge was to stamp on felt. The image is not quite clear with just one layer of ink so I re-stamped it. It is not that dark compared to the ones stamped on paper, but it is still visible.


I then stacked some die cuts to hold the stamped image. I felt that it was missing something with just the main embellishment. I figured another layer of cardstock and patterned paper would balance it out. (I just love layers and dimensions!)
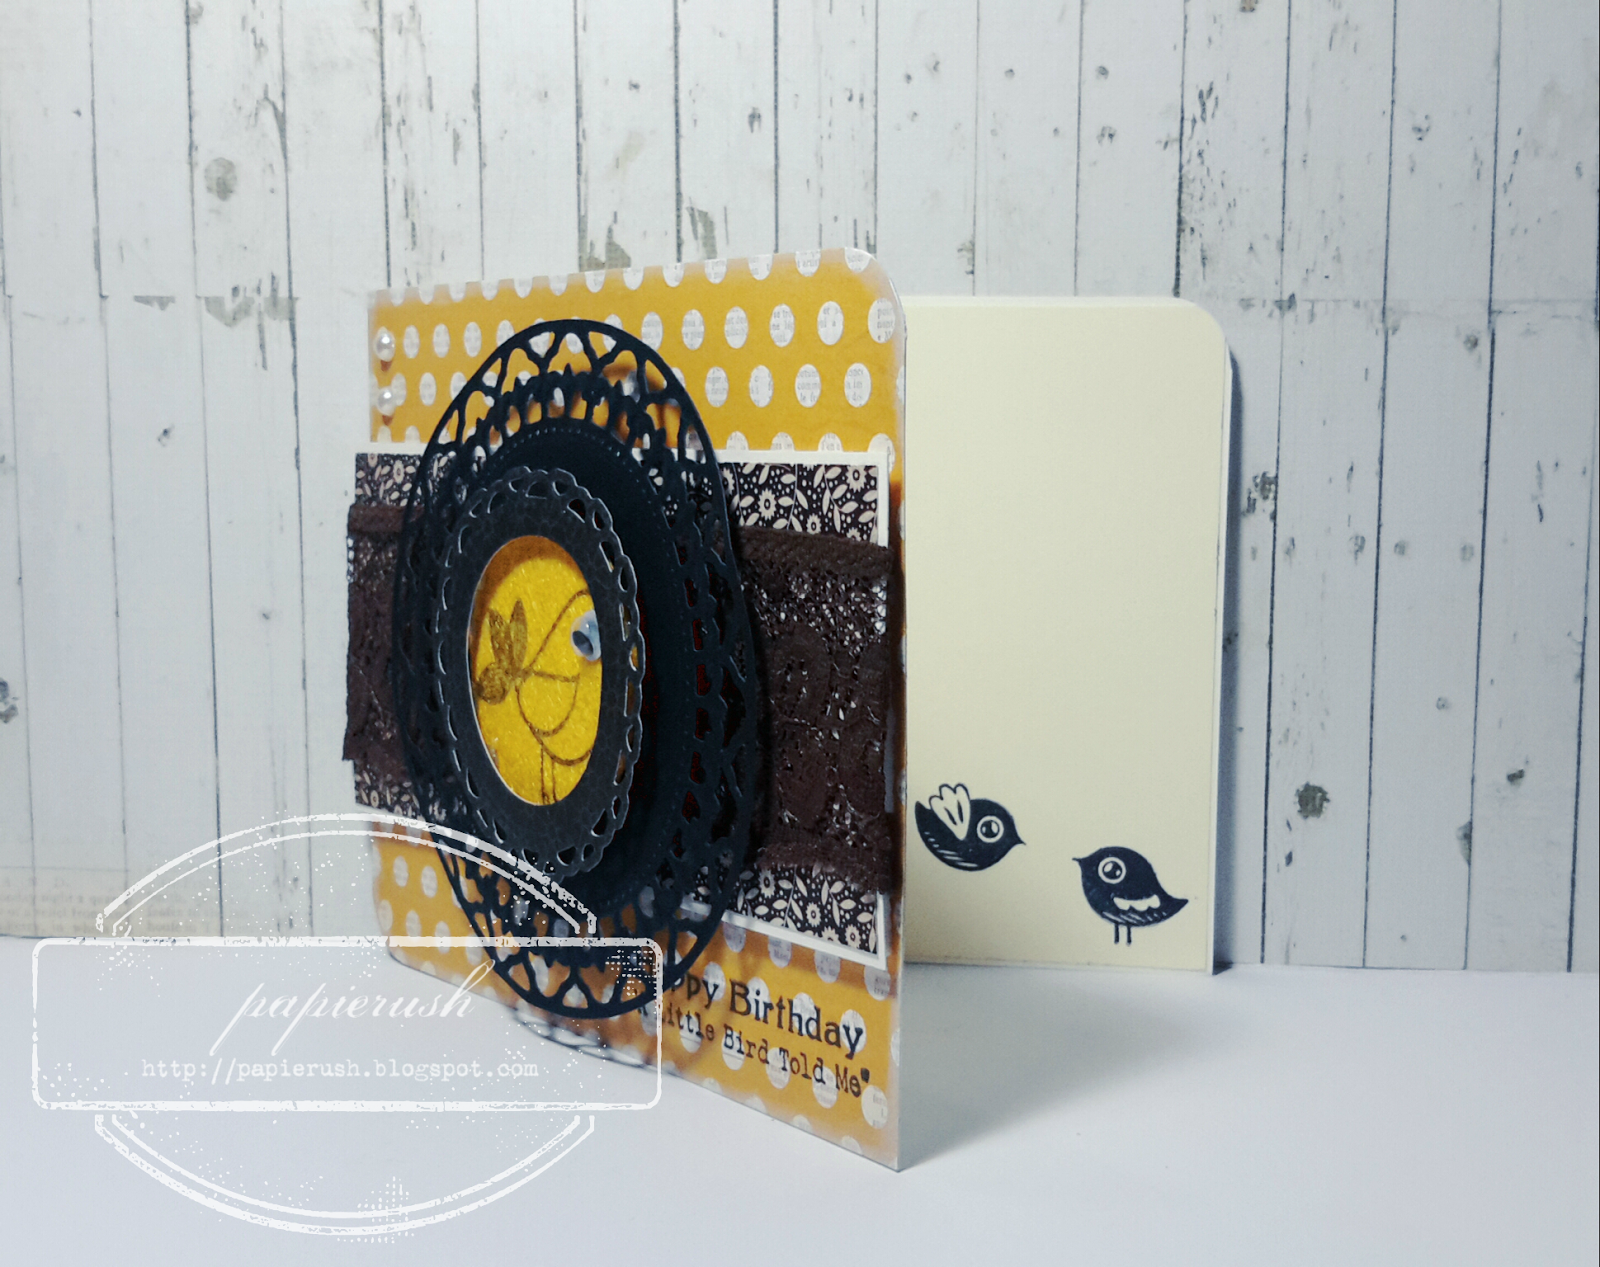


On the other hand, I already adhered the matting on the inside of the card before deciding to round two corners of the card. Thus, the uneven corners on the inside panel. [sigh]. 

After adding the different layers of paper, felt and lace, it still felt kind of odd. Something was still lacking. I tried placing random embellishments like metal charms, buttons, resin flowers, but to no avail. I just decided on affixing pearls and then inking the edges. That was that. I ended it there.

I’m glad I finished the third one. Even though it got delayed, I’m still within my target. Woohoo! Way to go! Till the next one (coming right after this post)!

P.S. I will be giving this card to a college friend who I haven't seen for quite a long time now. I just posted a photo of it on her FB wall, but she has not commented. I don't think she saw it yet. Hmn. She might not be checking her FB as often as another person again. I hope she sees it soon. :(


MATERIALS AND TOOLS USED: Bevania Splendorgel Board Paper Ivory, Prestige Board Paper Zulu Black, Biotop Color Specialty Paper Vanilla, My Mind’s Eye Lost & Found Two 6x6 paper pad Sunshine, Kaisercraft 12x12 Pickled Pear Collection, lace trimming, self-adhesive pearls, googly eye, Inkadinkado Clear Stamps Inspirational Lift and  Home Sweet Home, Imaginisce Snag ‘em Acrylic Stamps Song Bird, Ranger Archival Ink Jet Black, Color Box Cat’s Eye Queue Pigment Ink Pad Cream White, Spellbinders Nestabilities Splendid Circles, Cuttlebug Machine V2

CHALLENGE #12: Make Your Own Ruffle

CARD# HPJ-2015-12: Ruffled Onesie


Here’s the 12th card—a onesie-shaped card. Again, it was one of my unfinished projects last year. I was supposed to make a couple for friends’ and cousins’ babies, but I just didn't get to complete a single one. At least I’ll have one ready this year.

But wait! The challenge was not about making a onesie card. Haha. It was to make your own ruffle and I sure did mine. Hehe.

I used a length of lace trimming and hot glue to make the ruffle and used two other kinds of lace trimming for the collar and the sleeves (which I no longer ‘ruffled’). I love how the card turned out! I’ll definitely make some more for new babies this year.

Before I end this post, I’d like to let you know that I have bought a bottle of bleach. I will test it later to see if it would work. So, until tonight! Thank you for stopping by!

P.S. I really loved how this card turned out and it was a perfect gift for a client's baby girl's first birthday. I included this with the guestbook I made. If you haven't seen that yet, you can check it here.

MATERIALS AND TOOLS USED: Bevania Splendorgel Board Paper White, 6x6 patterned paper, lace trimmings, silk flowers, paper flowers, brads, button, pearls, crystals, Stanley Glue Gun, Spellbinders Shapeabilties D-Lites Sprigs, Cheery Lynn Designs Fanciful Flourish, Cuttlebug Machine V2

CHALLENGE #11: Doll Up A Die Cut

CARD# HPJ-2015-11: Honey

Hello! Welcome to today’s post. This was supposed to be up yesterday, but we had a problem with our internet connection. Tsk. It didn’t work for several hours and after trying to ascertain that the problem lied on the ethernet cable, my browser wouldn’t let me post on tumblr. How frustrating! And I am still unenrolled! I just hope the problems would end there. Ugh.


I have yet to do challenge #9, but I managed to do the 11th and 12th. This post is about my take on the 11th challenge which was to doll up a die cut. I used diamond fold for the base and I threw in a doily, paper flowers, metal charms and pearls for the embellishment. I will give it to Demi on her birthday next month. I hope she still likes pink and purple. So that was that. The next card will be coming right up. Thanks for looking!

P.S. For you who are new to this type of card fold, this is called a diamond fold card. It is very easy to make. If you are interested to make one yourself or just curious to know how it is done, you can check out a tutorial by Beate Johns of Splitcoaststampers here. Thanks again!

MATERIALS AND TOOLS USED: Bo Bunny 12x12, Elite Board Paper Brown, Bevania Splendorgel Board Paper Ivory, paper doily, paper flowers, die cut, 3D sticker, metal charms, pearls, Spellbinders Nestabilities Labels Thirty-Five, Cheery Lynn Designs Fanciful Flourish, Cuttlebug Machine V2, Martha Stewart Scoring Board

CHALLENGE #10: Make Your Own Buttons

CARD# HPJ-2015-10: Hearts

Hello everyone! I know you might be wondering where card #9 is. The challenge was to use bleach, but unfortunately, the only kind that we have at home is for colored clothes. I tried using it to stamp an image on a piece of cardstock, but nothing happened. Tsk. I would need the regular one. I guess it will have to wait until I get my hands on a bottle of the right bleach.


For now, I am showing you what I came up with for the tenth challenge. I had to make my own buttons. I have these rub-on stickers that came with an order a few months back for free. I transferred the images onto a black cardstock, punched some holes and coated each image with crackle paint. I then cut the hearts out after drying. I tied a length of baker’s twine on the ‘buttons’ on the front of the card and left the third one as is. 

I adhered the hearts on a die cut with foam tape for dimension and used lace trimming to close off the triangle trifold card.

It was another fun and simple project. If everything works out fine on my enrollment today, I’ll really try to finish off three challenges. Thanks for stopping by! Have a wonderful evening (or day)!


MATERIALS AND TOOLS USED: Rives Board Paper Tradition Red, Prestige Board Paper Zulu Black, Bo Bunny 6x6 paper pad Enchanted Collection, Rouge de garance 6x6 paper pad Nympheas, lace trimming, baker’s twine, self-adhesive crystals, rub-on sticker, clear stamp, Ranger Archival Ink Jet Black, Ranger Distress Crackle Paint Rock Candy, Spellbinders Nestabilities Fleur De Lis Squares, Cuttlebug Machine V2, ticket hole punch

CHALLENGE #9: Use Bleach

CARD# HPJ-2015-09: For You


Hello there! It’s me again. I finally finished challenge #9. After several attempts of stamping on pieces of cardstock using bleach, I was able to get a clear image which I used as the focal point for the card. If you ask me, I don’t feel good on how it turned out. It seems a bit off, but it’s done. I’d better make the next one good. I’m hoping… I am thinking of making a card for one of my favorite idols’ birthday (which is today). We’ll see if I could incorporate the next challenge with the card I am planning to make. Later!

P.S. By the way, for those who do not know what this card base is called, it is an easel card. A tutorial by Beate Johns of Splitcoaststampers can be found here.


MATERIALS AND TOOLS USED: Bevania Splendorgel Board Paper White, kraft paper, Elite Specialty Paper Buffalo Brown, My Mind’s Eye 6x6 paper pad Lost & Found Sunshine, Graphic 45 Staples Collection Flowers, lace trimming, metal charms, self-adhesive crystals, brad, Lady Bug Ink Clear Stamps, Kaisercraft Clear Stamps Laugh, Zonrox Bleach Original, Ranger Archival Ink Jet Black, ColorBox Cat’s Eye Queue Pigment Ink Pads Antique Pewter, Beauty Premium Pigment Ink Black, needle and thread, Spellbinders Nestabilities Lacey Ovals, Cuttlebug Machine V2

CHALLENGE #8: Use A Yard of Ribbon

CARD# HPJ-2015-08: Moment

¡Hola a todos! ¿Qué tal? Bueno, mi semestre empezó ayer. Sólo tengo una clase este semestre pero creo que será un poco intenso ya que estamos preparando hacer la tesis. ¡Ay! ¡Espero que todo salga bien!

Alright, I’m still a bit in Spanish mode. Gah. I haven’t used the language for, well, since forever (or so it seems) and I am afraid I forgot to speak it. Anyway, it will start to get busy in the next couple of days and if I find a job next month, I’d go back to being a zombie again. At least I will have the moolah to buy more craft supplies. Hehe.


I’m done with the eighth card. The challenge was to use a yard of ribbon. As you can see, it’s a floral card again. Can’t blame me. I love using flower embellishments. I have different sorts made of paper, fabric, plastic, metal, etc. I just can’t get enough of them. The next time I have some cash I’d definitely restock my supply.

I’m still one challenge late. I’ll try to do the next one within the day. I didn’t make it earlier since I had to use bleach. I didn’t want to clean up with water and soap after making it so I decided to make it during the day. I’ll post some photos as soon as I finish with it. Later! Thanks for looking!

P.S. I have given this lovely pink and green concoction to one of my friends from my previous job, Ate Cathe.


MATERIALS AND TOOLS USED: Bevania Splendorgel Board Paper White, My Mind’s Eye 6x6 paper pad Lost & Found Two Blush and Breeze, All About Scrapbooking 12x12, Graphic 45 8x8 paper pad Typography, Kaisercraft Pickled Pear Collection Sticker Sheet, twill ribbon, paper flower, wooden flowers, beads and pearls, self-adhesive crystals, needle and thread, Spellbinders Nestabilities Captivating Squares, Spellbinders Shapeabilities D-Lites Sprigs, Cheery Lynn Designs Dies Fanciful Flourish, Cuttlebug Machine V2

CHALLENGE #7: Use 10 Embellishments

CARD# HPJ-2015-07: Untitled


Hi there! Welcome to today’s post. It’s the seventh card and as I’ve mentioned in the previous post, the challenge was to use 10 embellishments. Well, as you can see, there are more than ten embellishments on the card. Each of the samples on the magazine also used more than ten embellishments. I just interpreted the challenge as using ten different embellishments. See? There are wooden embellishments, crystals, plastic button, wooden buttons, brad, silk flower, metal charms, twine, molding paste and ribbon embellishment. Hehe. And oh, the base was another one of my unfinished projects from last year.

I’m one challenge late and I am still thinking if I should do it tonight. I don’t know. Maybe after I organize my topsy-turvy closet. My class starts at 10AM tomorrow and I’m afraid I won’t wake up on time if I doze off later. I might as well stay awake the whole night. Hmn. I’ll just let you know on the next post.

Thank you for stopping by! 


MATERIALS AND TOOLS USED: Bevania Splendorgel Board Paper Ivory, Bo Bunny 6x6 paper pad Etc Collection, My Mind’s Eye 6x6 paper pad Six By Six Away We Go, silk flowers, brad, assorted buttons, Eno Greeting Wooden Embellishments, self-adhesive crystals, ribbon embellishment, metal charms, jute twine, needle and thread, Golden Molding Paste, The Crafter’s Workshop stencil Mini Brocade, ColorBox Cat’s Eye Queue Pigment Ink Pads Colonial Blue and Dune, rubber stamp

75 CREATIVE CARD CHALLENGES

At the start of the year, I decided to do the 75 card challenges that were featured on one of the issues of Papercrafts Magazine. I wanted to be more productive this year crafts wise and at the same time I wanted to learn more techniques and hone my skills even further. So, I started this project.

I posted the challenges that I've done on my tumblog and since I told you I would be mostly using my blogger (this blog) to show you my creations and the details of how I came up with them, I am going to put them here as well.  I would probably just delete the descriptions that I've placed on Tumblr and transfer them here. There’s a slide below of the challenges I've done so far. I would be posting the cards one by one along with their details. I hope you check them out. Thanks for stopping by!


CHALLENGE #6: Use Nothing But Stickers


CARD# HPJ-2015-06: Moments

Hi again! Here’s card #6. The challenge was to make a card using nothing but stickers. From the background to the embellishments, I used stickers. I just added foam tape to some for dimension. I didn’t quite like how I placed the circle epoxy stickers, but I could no longer re-arrange them.I tried to peel one off and it snagged the paper sticker. Not a good idea. Tsk. I had to let it that way or it would make things even worse. [sigh]

I wasn’t satisfied with the outcome, but then again these things happen. I have sixty-nine more cards to work on and I’ll have more chances of doing better so there’s no use feeling down. I’ll just have to focus on the next challenge—use ten embellishments.

Thank you for looking! ¡Hasta pronto!

MATERIALS USED: Bevania Splendorgel Board Paper Ivory, assorted stickers


CHALLENGE #5: Make A Quilt-Inspired Card

CARD# HPJ-2015-05: Quilted Love

Woohoo! I finished the fifth card earlier today. I said in a previous post that I would probably work on a hexagon pattern for this particular card, but I changed my mind. I remembered a sampler canvas project that I’ve seen on Pinterest before and I thought that I could perhaps employ the technique on my card. I believed that it would be easier to make circles than hexagons so I went with circles. Heh. If you’re interested to know how to make the circles with a quilted look, Creating Keepsakes posted a tutorial on their blog.


I didn't do much on this card since the base was pre-made. It was one of the projects that I started last year, but didn't get to finish. You know those times when you are working on something then all of a sudden you get stuck and couldn’t move on? I would drop it and start another one. I have a lot of these unfinished stuff. I’m glad I could do something with one of them after all those months of being left alone in a box. Hmn. Maybe I could continue working on the others as well during the challenge period. Yay!


Anyhow, aside from the circles, I used three layers of lace trimmings to make the pattern pop up. On the inside, I covered both panels with patterned paper. I had to cover the extra lace at the back.

So that was the fifth card. I’ll post the next one in a little while. Thanks a bunch for stopping by!

MATERIALS AND TOOLS USED: Bevania Splendorgel Board Paper White, Papemelroti kraft paper, Kaisercraft 12x12 Forget-Me-Not Collection, paper scraps, lace trimmings, buttons, metal charms, needle and thread, ColorBox Cat’s Eye Queue Pigment Ink Old Rose, bone folder, Spellbinders Nestabilities Fleur De Lis Squares, Cuttlebug Machine V2

CHALLENGE #4: Stamp With Paint

CARD# HPJ-2015-04: Love

I just love this card! It is a simple one with minimal embellishments. Ha. Even with a simple card, I can’t feel right without adding dimensions. So there’s a wooden heart with stamens wrapped around it. And the sentiment was adhered using foam tape.

As I’ve mentioned, this card is simple, but I can say it is not plain. It is still alive due to the red stamens that accentuate the basic colors in the palette- black and white.


Ooh. I kept gabbing and forgot what the card was about. It was for the fourth challenge 'Stamp with paint'. I was thinking about the fast approaching Valentine’s Day yesterday and I thought that I should make the next card challenge into a Valentine’s Day card and that was what I did. I wanted to go for a ‘messy’ look, but I don’t know if I achieved it. The stamped text perhaps since the paint was all over the place. I mean it was a bit tricky to use watercolor (the one on a tube) to stamp. It was sticky and the paint on the surface of the stamp was uneven. I just went along with it since I was after the messy look. With the background stamped with a regular archival ink, the whole card looked fine. It turned out well more than what I expected. That’s a good thing.


So having finished the fourth challenge, I would be tackling the fifth one and I say tackling because it would prove to be a bit challenging. Gah. I am not a patient person and I dislike doing repetitive things for a long time. I’d have to hold my impatience in for the next one. Do you know what it is? It is to be a quilt-inspired card. Whoa! Looking at the samples on the magazine, I would have to work on circles, rectangles or hexagons and I have to make more than ten of them from what I can see (which is A LOT for me). Oh my. I’d particularly like to go with hexagons. It would sure cost me more time to finish. I’ll let you see what I come up with later today. ¡Hasta pronto!

MATERIALS AND TOOLS USED: Bevania Splendorgel Board Paper White, Rives Board Paper Tradition Black, Eno Greeting Wooden Embellishment, stamens, Kaisercraft Clear Stamps Dictionary Meanings, Graphic 45 Antique Typewriter Wooden Rubber Stamps, Ranger Archival Ink Jet Black, Pebeo Water Colour Chinese White


CHALLENGE #2: Make A Creative Handmade Flower


CARD# HPJ-2015-02: Rolled Flower Happy Birthday

I wasn’t able to finish the card before midnight last night. I used molding paste and acrylic paint on the background so I had to wait for it to dry. Remember I can’t use my dryer.
Even if I missed my self-imposed deadline, I’m still happy it turned out well. I will just have to make a ‘card’ planner (like my sister suggested) so I can go through my card making smoothly.

Anyway, let me just tell you quickly how the card was put together. First, I made a 4” x 4” base from a leftover white cardstock. I cut another square of cardstock slightly smaller than the base (minus 1/8” all around). I put down a stencil onto the surface of the cardstock and spread an even amount of molding paste. Afterwards, I spattered some paint and painted the edges with black acrylic paint. While waiting for it to dry, I made the flowers. If I remember it right, I’ve posted how it was done somewhere in my blog so I won’t go into further details.

After the background has dried, I stamped flourishes and adhered the paper flowers. I made a small bow from a length of lace trimming and affixed it onto the card. I added a brad and some resin embellishment as well as several black crystals. I ran a piece of black cardstock through my Cuttlebug with a Spellbinders die and stamped the ‘Happy Birthday’ sentiment on it. I don’t have a white matte ink pad except for Brilliance so I had to overwrite the text with a white pigment ink pen. When I was satisfied with the embellishments, I placed a couple of foam tape at the back of the cardstock and adhered it onto the card base and that was that.

This was another easy and fun project. I hope you find it interesting. I will post the next one in a little while (the one which was supposed to be for yesterday). Have a wonderful day (or night in our region).

MATERIALS AND TOOLS USED: Bevania Splendorgel Board Paper White, Rives Board Paper Tradition White, Prestige Board Paper Zulu Black, Bo Bunny 6x6 paper pad Enchanted Collection, lace trimming, resin embellishment, All About Scrapbooking brad, self-adhesive crystals, Bo Bunny Clear Stamps Flourishes and Such, Ranger Archival Ink Jet Black, The Crafter’s Workshop stencils Mini Window Screen, Golden Molding Paste, Pebeo Acrylic Paint Mars Black, Tsukineko Dew Drops Brilliance Pigment Ink Pad Moonlight White, Uni-ball Signo Broad White, Spellbinders Shapeabilities Fancy Framed Tags One, Cuttlebug Machine V2


CHALLENGE #1: Use A Page From The Phonebook

CARD# HPJ-2015-01: Memory

Hi there! Have you seen the previous post? It’s a card I made earlier which I posted on my Instagram. As I have said the other day, I will be doing the 75 Creative Card Challenges from Paper Crafts Magazine and this is the first in the series. I’ve had that magazine for quite some time now, but I only used it as a basis for layouts and color palettes. I have to do something about it.

In the previous year, I started to be productive crafts-wise. I began accepting commissions for handmade cards and dabbled into mixed media art. But I haven’t made that many cards as compared to other artists who actually made hundreds the whole year round. So this year I’ve decided to be more active in the world of arts and crafts, connect with communities, and create more than what I could make in the past. I want to hone my skills even more, learn new techniques and apply them, make more people happy with what my hands could create and just simply live. I would like to live each day doing what I love and sharing it to anyone who would care. Wouldn’t it be wonderful? I just hope I can do this for a very long time.


 The card measures 4 1/2" x 5 3/4".


Going back to the card, the first challenge was to use a page from a phonebook. We don’t have one in our apartment since we do not have a landline. What I used instead was a page from an old pocketbook which I bought a couple of years ago for the sole purpose of being used in my works. It is still whole. I only ripped a few pages over the years. Anyhow, I used the book page as a substrate for my stamped images which I fuzzy cut and layered to make embellishments.

It took me almost two hours to finish because I had to wait for the molding paste and ink to dry naturally. I couldn’t use my dryer for fear of disturbing our neighbors with the noise in the wee hours of the night. They could file a complaint and I will surely be in trouble. Still it’s not bad. I mean two hours? Most of the time it takes the whole day for me to finish a single card. (I’m such a slow card maker.) I think I’m improving. I’ll have 74 more cards to practice on. Hehe. Till the next card (later today!).

MATERIALS AND TOOLS USED: Bevania Splendorgel Board Paper White, Elite Board Paper Buffalo Brown, pocketbook page, Kaisercraft Pickled Pear Collection Sticker Sheet, paper flowers, wooden flower, Eno Greeting Wooden Embellishment, pearls, beads, crystals, Kaisercraft Clear Stamps Dictionary Meanings and Botanical Odyssey, Ranger Archival Ink Jet Black, Tsukineko Dew Drops Brilliance ink pads, Golden Molding Paste, The Crafter’s Workshop stencil Mini Swiss Dots]

Sunday, February 15, 2015

CHALLENGE #15: Use Crepe Paper


Hello! I skipped another challenge. I’m sorry for that. I was supposed to do the paper bag challenge first, but I got my hands on this beautiful metallic crepe paper and I thought I should just go ahead with the next one.

Remember the Ferrero Rocher bouquet? I used a strip of the paper for this card. When I unraveled the paper, one end was folded and cut unevenly. I cut a strip of it and used it on the card. I made ruffles and adhered them onto the card base with hot glue. I then added a die cut in the middle and placed a wooden flower whose color would complement the gold background. There was a bit of a white part at the bottom of the card so I covered it with brown lace trimming. For the final touch, I put two foam stickers that spell out ‘hi’. And it was done.

This is one of the simplest and quickest cards I ever made. I love the gold and the yellow flower. I hope to finish another challenge soon. Till next time. Thanks for stopping by! Have a wonderful weekend.

MATERIALS AND TOOLS USED: Bevania Splendorgel Board Paper White, Sino-Harvest Crepe Paper Metallic Gold, Tim Holtz Paper Stash French Industrial Revolution, lace trimming, wooden flower, All About Scrapbooking foam alpha sticker

CHALLENGE #13: Stamp On Transparency

HELLO GUYS! It's me again. I have a lot of catching up to do. I got sick a couple of days ago so I didn't get to do much.
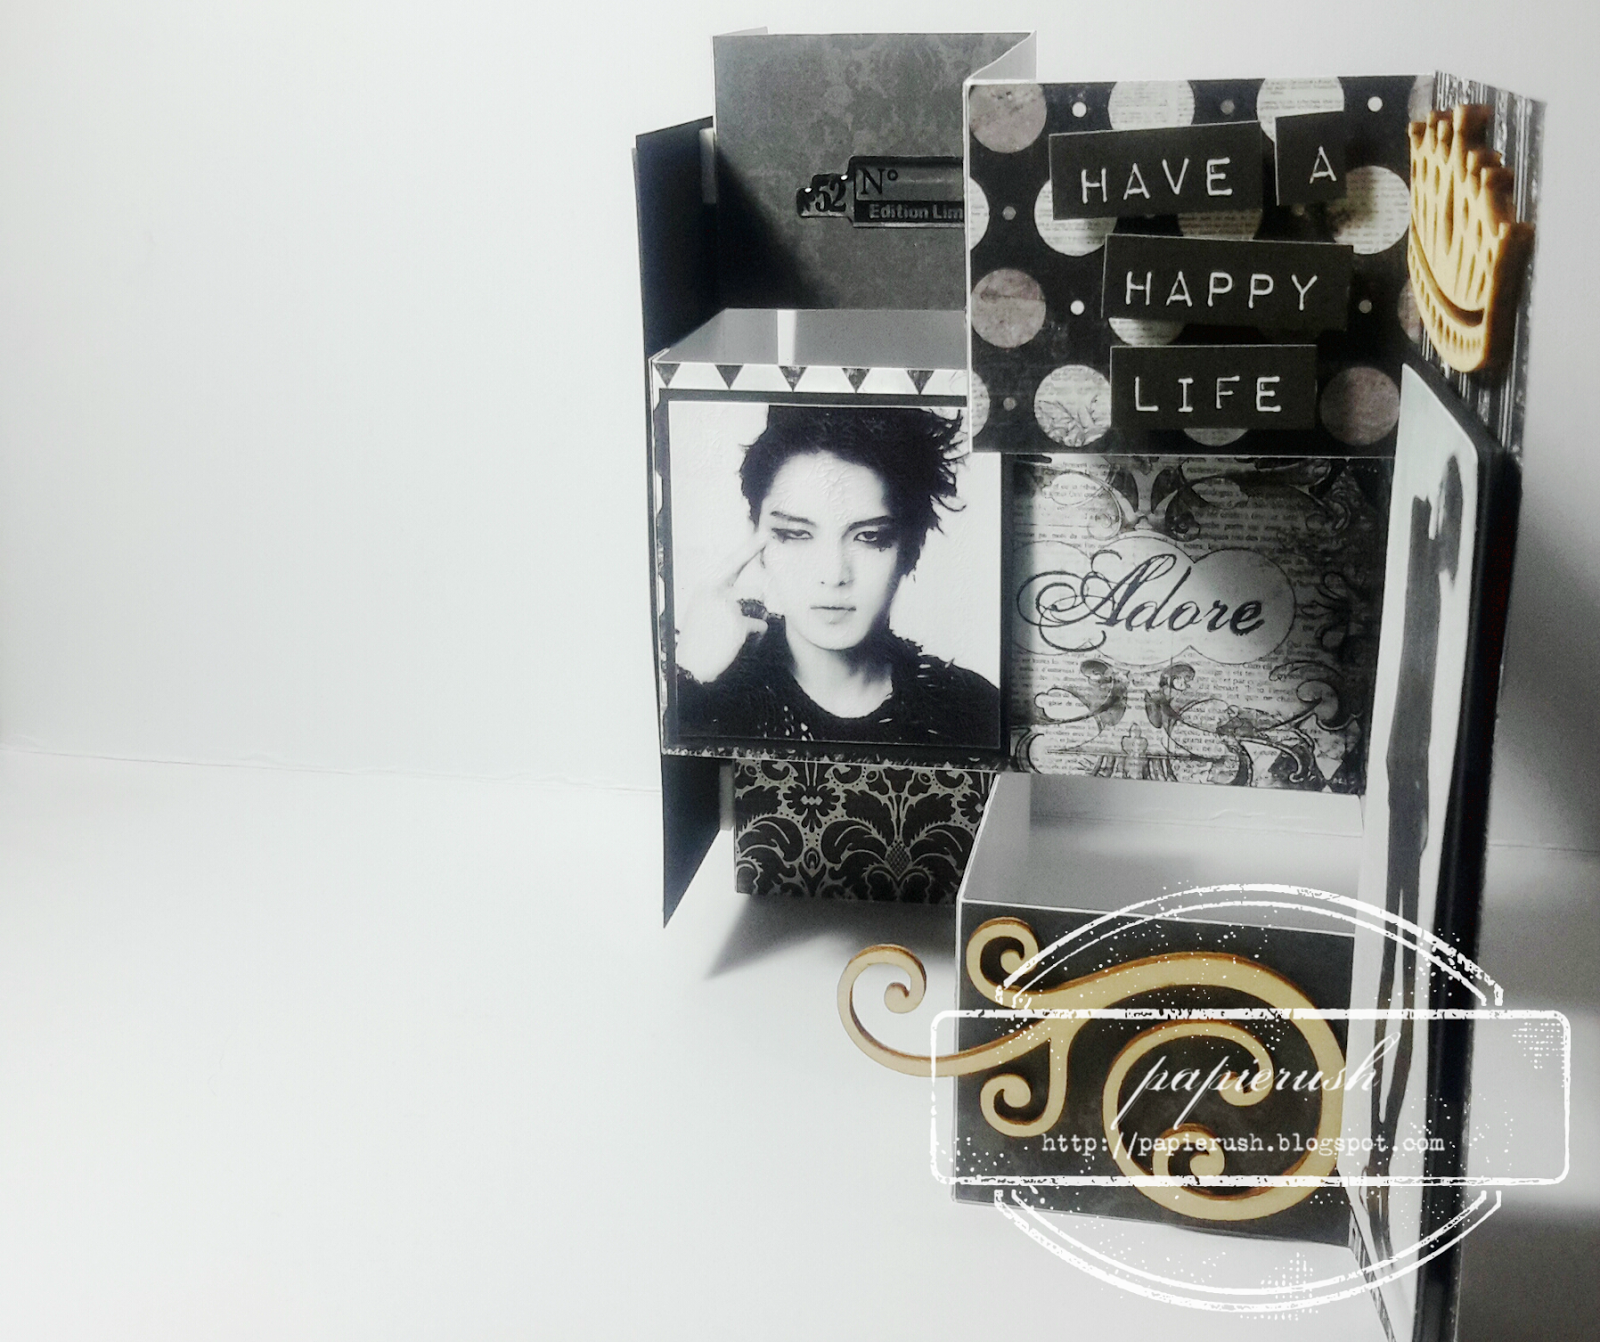
The card measures 4 ¼” x 6” when closed.

This card here was something I made last month for the birthday of one of my favorite artists—JYJ’s Kim Jae Joong. Well, I did not get to post it on IG before the clock struck 12, but I posted it anyway and greeted him a belated happy birthday. Heh.
It is a black and white trishutter card. Ooh. I am starting to name it my favorite card fold. People who ask me to make them cards almost always ask for a trishutter. Anyway, I used some of his photos I found on Google for embellishments and made one the focal point. There weren’t any other fufus except for the stamped transparencies, stickers and wooden embellishments. 
So that was that. Another one of the challenges finished. Thanks for looking today!
MATERIALS AND TOOLS USED: Bevania Splendorgel Board Paper White, Rives Board Paper Tradition Black, My Mind’s Eye Lost & Found Two 6x6 paper pad Sunshine, Echo Park 6x6 paper pad This & That, Bo Bunny 6x6 paper pad Enchanted Collection, Rouge de garance 6x6 paper pad Nympheas, printed images, acetate, epoxy stickers, Kaisercraft Pickled Pear Collection Sticker Sheet, Eno Greeting Wooden Embellishments, Ranger Archival Ink Jet Black, Ranger Distress Crackle Paint Rock Candy, Faber-Castell Permanent Marker, Kaisercraft Clear Stamps Botanical Odyssey and Bundle of Joy