Monday, November 14, 2016

CARD# HPJ-2016-28: Vintage Birthday

Hi again! Here's a trishutter card that I made last month. It was supposed to be posted in time for World Cardmaking Day, but things happened. I was not able to participate online. 

Anyway, it's a mixed media card. I love how it turned out!


The card measures 4 1/4"x 6" when closed.


Like what I usually do with my trishutter cards, I use pretty papers for the various panels and little to no embellishments. I focused the embellishments on the front of the card. I just stamped some sentiments and image on the inside panels to add interest.


To add texture to the already pretty background, I stenciled with light molding paste and layered several die cuts. I then adhered the resin frame and put in the paper flowers. I brushed some gesso onto the surface of the embellishments. For the sentiment, I wrote on a black board paper using white pigment ink pen. And as a finishing touch, I stamped some text on the background.


I love this particular trishutter card! It's so pretty! I wish I could keep it for myself, but it has to go somewhere. I hope that whoever gets to take it home would love and cherish it like I do. 

That was that! Thanks for looking! Up next is another mixed media card. This time, it's a top fold card. I hope you check it out. Thanks again!


MATERIALS AND TOOLS USED: Bevania Splendorgel Board Paper White, Eno Greeting 12"x12" paper pad die cuts, Heidi Swapp 6"x6" paper pad Mixed Media, paper flowers, Eno Greeting Resin Embellishments, Golden Light Molding Paste, The Crafter's Workshop Stencil Mini Tile Texture, Pebeo Gesso, Kaisercraft Clear Stamps Perfume, Bo Bunny Clear Stamps Sentiments, Heidi Swapp Mixed Media Clear Stamps Script, Ranger Archival Ink Jet Black, Uniball Signo Broad Pigment Ink 0.7, Stanley Glue Gun

Monday, September 19, 2016

CANVAS# HPJ-2016-02: Old Time


Hi there! I finally finished this canvas. I made the base ages ago, but I just couldn't finish it. I stored it away and I just brought it out this morning to work on it again. 

Here is how it turned out.

We went on a trip to the Taal Heritage Village last April and it was like traveling back into time-into the bygone days of the Spanish period where houses were made of stone on the lower floor. For this they are called bahay na bato. This little town is rich with history and culture. We had visited the ancestral houses, others turned into museums, of important personages of our country's history and learned a lot about their lives back then and of course their contribution to society. We have only been there for an overnight stay, but we have seen and heard and felt a lot. This visit has had a deep impression on me. I hope I could go back there some day for a longer stay.
Anyway, let's go back to the canvas. Remember the 12"x12" paper pad I bought from Wellmanson's a few months ago? The papers were so pretty I squeed while leafing through the pages. They are all so awesome. Most of them I thought I could use on a canvas especially the one that I used on this particular project. Upon seeing the page, I immediately thought of making a mixed media canvas with our photo from our Taal Village trip. With that in mind, I began the project.
I started by coating the edges of the canvas with black acrylic paint. After drying, I adhered the patterned paper onto the canvas using soft gel. At first I thought I ruined it because there were bubbles all over the canvas. I wanted to pull out the paper, but controlled myself (which was a feat since I was so annoyed buy it). I just put it aside while trying to get some breather. I got frustrated over it obviously. When I got back from doing some other things to see what I could do to salvage it, I was surprised to find it dry and smooth. The lumps were gone. It was as if those lumps never existed. I told myself that I will just stick to Elmer's glue with a part of water, but I guess soft gel works fine as well. It just needs time to dry. 

It was the first time that I used it to adhere a large piece of paper onto a canvas. I have seen videos of Elena Morgun using soft gel medium in adhering paper and embellishments on her projects, but I have not tried it before this. I still prefer using a mixture of white glue and water though and my new favorite for adhering embellishments and boards, Aleene's Turbo Tacky Glue

I layered scraps of patterned paper, book paper and board paper onto the right side of the canvas to serve as a background for the photo. I then stenciled with molding paste. That was the last step I've taken before completely stopping. I just didn't know how to go on.

This is nothing new. This happens every once in a while then I would pick it up and work on it again. And a lot of time, the finished project is so different from what I pictured it should be.

So this morning, I tasked myself to complete it no matter what.


I adhered the photo onto the matte. Well, I smudged gesso around its edges first before doing so. I then put in the wooden embellishments and the metal charms and the paper flowers. I splattered ink onto the surface and gessoed the embellishments. I added some more metal elements and some beads and adhered the sentiment. I put in some crystals as a finishing touch. That's that. Project complete! Great! I can now move on to my art journal. I still owe you a couple of pages. 

I hope you come back later and check out my art journal pages. Thanks for stopping by today! Happy Monday!


MATERIALS AND TOOLS USED: Conda 12"x12" Canvas, Reeves Acrylic Paint Mars Black, Eno Greeting 12"x12" paper pad Retro Series, scraps, printed photo, Eno Greeting Wooden Embellishments, Rosie's Studio Wood Veneers, Eno Greeting 3D Stickers, paper flowers, metal charms, self-adhesive crystals, Golden Molding Paste, The Crafter's Workshop Stencils Mini Art Is and Mini Chicken Wire Reversed, Golden Soft Gel Gloss, Aleene's Turbo Tacky Glue, chipboard, Pebeo Gesso

Sunday, September 18, 2016

CARD# HPJ-2016-23: Bon Voyage 2

Hi! I'm going to share a project that I made last week. It is actually a wallet fold mini, but I made it into a card. Well, a holder of tags for the messages. I made two of these before. I learned how to make it from Ginny Nemchak. It is easy and fun to make. It works great for a travel theme. If you want to know how it is done, you can check out Ginny's guide on Snapguide here.


The mini measures 3" x 4 1/2". It is really small which makes it even cuter. Heh.


I used a gift wrapper for the base. It is one of those wrapping papers that I hoarded from Papemelroti 2 or so years ago. I think I'll get some more of the same design if they still have some stock left. I hope they still have them. 


For the front of the card, I stamped some images in the background before stenciling with light molding paste. After the paste dried, I applied distress ink on the surface. I stamped a balloon image on a separate patterned paper and fussy cut it. I adhered chipboard at the back before affixing it onto the card. I then added the sentiment which I first stamped on a piece of patterned paper. I distressed and inked the edges. I put in the metal charms last to add more interest to the card. 


I stamped some more on the pockets.

I ran a die through my Cuttlebug and made several tags. These tags would hold the message for the recipient. 

I did not put inserts on the sides since Dino asked me not to. He only wanted to fill in the inside pockets.

So that was that. Another fun project done! I hope you liked it. Thanks for looking today! Have a great week!


MATERIALS AND TOOLS USED: Papemelroti Wrapping Paper, Rives Board Paper Tradition Black, Tim Holtz Paper Stash 8"x8" paper pad Menagerie, metal charms, lace trimming, Kaisercraft Clear Stamps Wanderlust, Bo Bunny Clear Stamps Dreamer, Ranger Archival Ink Jet Black, ColorBox Cat's Eye Queue Pigment Ink Chestnut, The Crafter's Workshop Stencil Mini Tile Texture, Golden Light Molding Paste, Ranger Distress Ink Mini Tea Dye, Aleene's Turbo Tacky Glue, EK Circle Punch 1/2", hole punch, Cuttlebug Machine V2


Sunday, September 4, 2016

CARD# HPJ-2016-21: Small Packages

Hello! Here's a baby shower card I made for a friend at work.


The card measures 4 3/4" x 6".

I adhered designer paper on only one part of the inside of the card. The other part I stamped with a pretty vintage image of a carriage. 


This was one of those cards I made in just a few minutes. I didn't think much about it. I just let my hand measure, cut and adhere layers of paper and add some buttons and pearls and a 3D sticker for the embellishments. Oh. And by the way, I inked the edges of the paper.

That was that. Super easy! I hope you like it. Thanks for looking today. Have a great week!

MATERIALS AND TOOLS USED: Bevania Splendorgel Board Paper White, Crate Paper 6"x6" paper pad Little Boy Blue, Eno Greeting 3D Stickers, buttons, self-adhesive pearls, Kaisercraft Clear Stamps Bundle of Joy and Little One, Ranger Archival Ink Jet Black, ColorBox Cat's Eye Queue Pigment Ink Dune

Sunday, July 31, 2016

CARD# HPJ-2016-16: Live Laugh Love

Hello there! Here is the third box card in the set. This was for Ate Jolly. She loves orange so I made something with elements of orange and of course some black and gold.
This is the most embellished of the three. Since I used black for the main die cut, I added a patterned paper for the background. I used bits of scrap from previous projects to build the background. Also, I added a resin embellishment. I adhered a couple of paper and silk flowers. I put in several metal charms and stamped on the paper. I then brushed some micro pearls over the embellishments. After drying, I adhered the sentiment and added the crystals as a final touch.
Since the die cut for the belly band is already ornate, I did not bother to add a punched border on the flaps of the box.


So that was that. I am so glad how the cards turned out. I was totally in the zone when I made them. Heh. My creative juices oozed out freely after weeks of not making anything. Watch out for my next post-it's a mixed media canvas. Thanks for looking!

MATERIALS AND TOOLS USED: Rives Board Paper Tradition Black, Best of Studio Calico 12"x12" paper pad, Eno Greeting 8"x8" paper pad Romantic, printed text, Eno Greeting Resin Embellishments, paper flowers, metal charms, lace trimming, self-adhesive crystals, micro pearls, Mod Podge Matte, Prima Marketing Clear Stamps Vintage Vanity, Ranger Archival Ink Jet Black, Spellbinders Nestabilities Captivating Squares, Cuttlebug Machine V2

CARD# HPJ-2016-14: Take Wing

Hi! My internet is still as crappy as ever, but at least I could upload some photos right now.

I think I've said in my earlier post that I'll be showing my recent box cards next. I made three box cards for my colleagues who celebrated their birthdays this month. Here is the first one. This was for Jeff.
It is always a challenge for me to make masculine cards. This was not what I originally started with. I made a mess on the first one. I didn't quite like it so it was junked. I thought of another way to make it. Voila! My fascination for steampunk and the sight of one of my overused clear stamps prompted me to the right direction. Here is what I came up with. I rummaged through my box of ever growing number of clear stamps to look for my Kaisercraft Diamonds Clear Stamp and my Multicraft Vintage Tool set and stamped away!


 I inked the surface of the diecut after stamping the images and worked on the hot air balloon. Like what I usually do, I stamped the image on piece of patterned paper (left over from some previous project) and adhered metal wings and crystals to make it more interesting. I love dimension so I adhered a piece of chipboard at the back of the image before affixing it onto the diecut. I added the sentiments and then the jump rings and spacers. I just love how it turned out! I wanted to keep it for myself, but oh well, I must give it to the birthday boy. I don't really know of he liked it, but I feel that he appreciated it. That's the good thing.
 This is what the card looks like, the box still closed and the belly band removed.

I made several die cuts for the messages. It was a little difficult to do so since my Cuttlebug is acting up. It's hard to turn the crank again. Anyway, I was still able to cut fine after exhausting a lot of energy. Haha. The hardship is nothing when I looked at the finished project. I'm so happy with it. 

I have decided to make box cards for the birthday celebrants for the remaining part of the year. It would be more consistent given the fact that it's for the team. Yay! The next celebration will be on September and I would need to make another set of three. I am thrilled since I already have an idea on what to make for the two ladies. It would be so much fun! As for the gentleman, I think he would like anything. Yehey for that!

The post ends here. Please do check out the next one for the second box card. Thanks for looking!


MATERIALS AND TOOLS USED: Bevania Splendorgel Board Paper Ivory, Rives Board Paper Tradition Black, Best of Studio Calico 12"x12" paper pad, Graphic 45 12"x12" Steampunk Debutante Collection Eclectic Emporium and Mechanical Mind, Tim Holtz Paper Stash 12"x12" French Industrial Revolution, Kaisercraft Clear Stamps Diamonds, Multicrafts Clear Stamps Vintage Tools, Inkadinkado Clear Stamps Inspirational Lift, Ranger Archival Ink Jet Black, Ranger Distress Ink Mini Spiced Marmalade and Black Soot, metal charms, jump rings, Martha Stewart Edge Punch Daisy, Spellbinders Dies Nestabilities Labels 35, Cuttlebug Machine V2

Monday, April 18, 2016

CARD# HPJ-2016-08: Birthday Girl

Hi again! Here's another card I made last February. It's a card with a box or also called by some as a box card. It was for one of my colleagues and friend Nessie. 

She loves cats. I thought of making her a card with a cat design, but then again when I was trying to come up with the layout, my mind completely went to making a layout for a vintage, floral one. There was still a cat in it since I put in a cute little notepad inside the box with a cat on the cover which she adored. Yay!

Here it is.


MATERIALS AND TOOLS USED: Rives Board Paper Traidition Black, Graphic 45 8x8 paper pad Time To Celebrate and Time To Flourish, Eno Greeting 3D Sticker, Eno Greeting Resin Embellishment, Chipboard Sticker, tags, metal charms, beads, paper flowers, self-adhesive pearls, shrink plastic embellishment, string, lace trimming, Kaisercraft Clear Stamps Flutter By, Ranger Archival Ink Jet Black, Prima Marketing Clear Stamps Vintage Vanity, Spellbinders Nestabilities, Cuttlebug Machine V2

Tuesday, February 16, 2016

THANK YOU!

Hello! Happy Tuesday! I need to go back to work tonight, but I still have a holiday fever. [Sigh.] I just hope it wouldn't be a tough night.

Anyhow, I am here to share to you several cards and whatnots that I made over the past few weeks as a way of thanking the owner and Design Team Leader of Bee Happy Crafts who was so generous to us for providing such lovely tools and supplies and for appreciating what we do.

I haven't been able to show my gratitude sooner (last October when my third month as a Design Team member ended), but I really wanted to give her a gift (or should I say several gifts) as a token of my gratitude. I just was not able to send them to her sooner. As the saying goes, 'It is better late than never.' Heh. I hope she likes them. Here they are.

1. Thank You Card
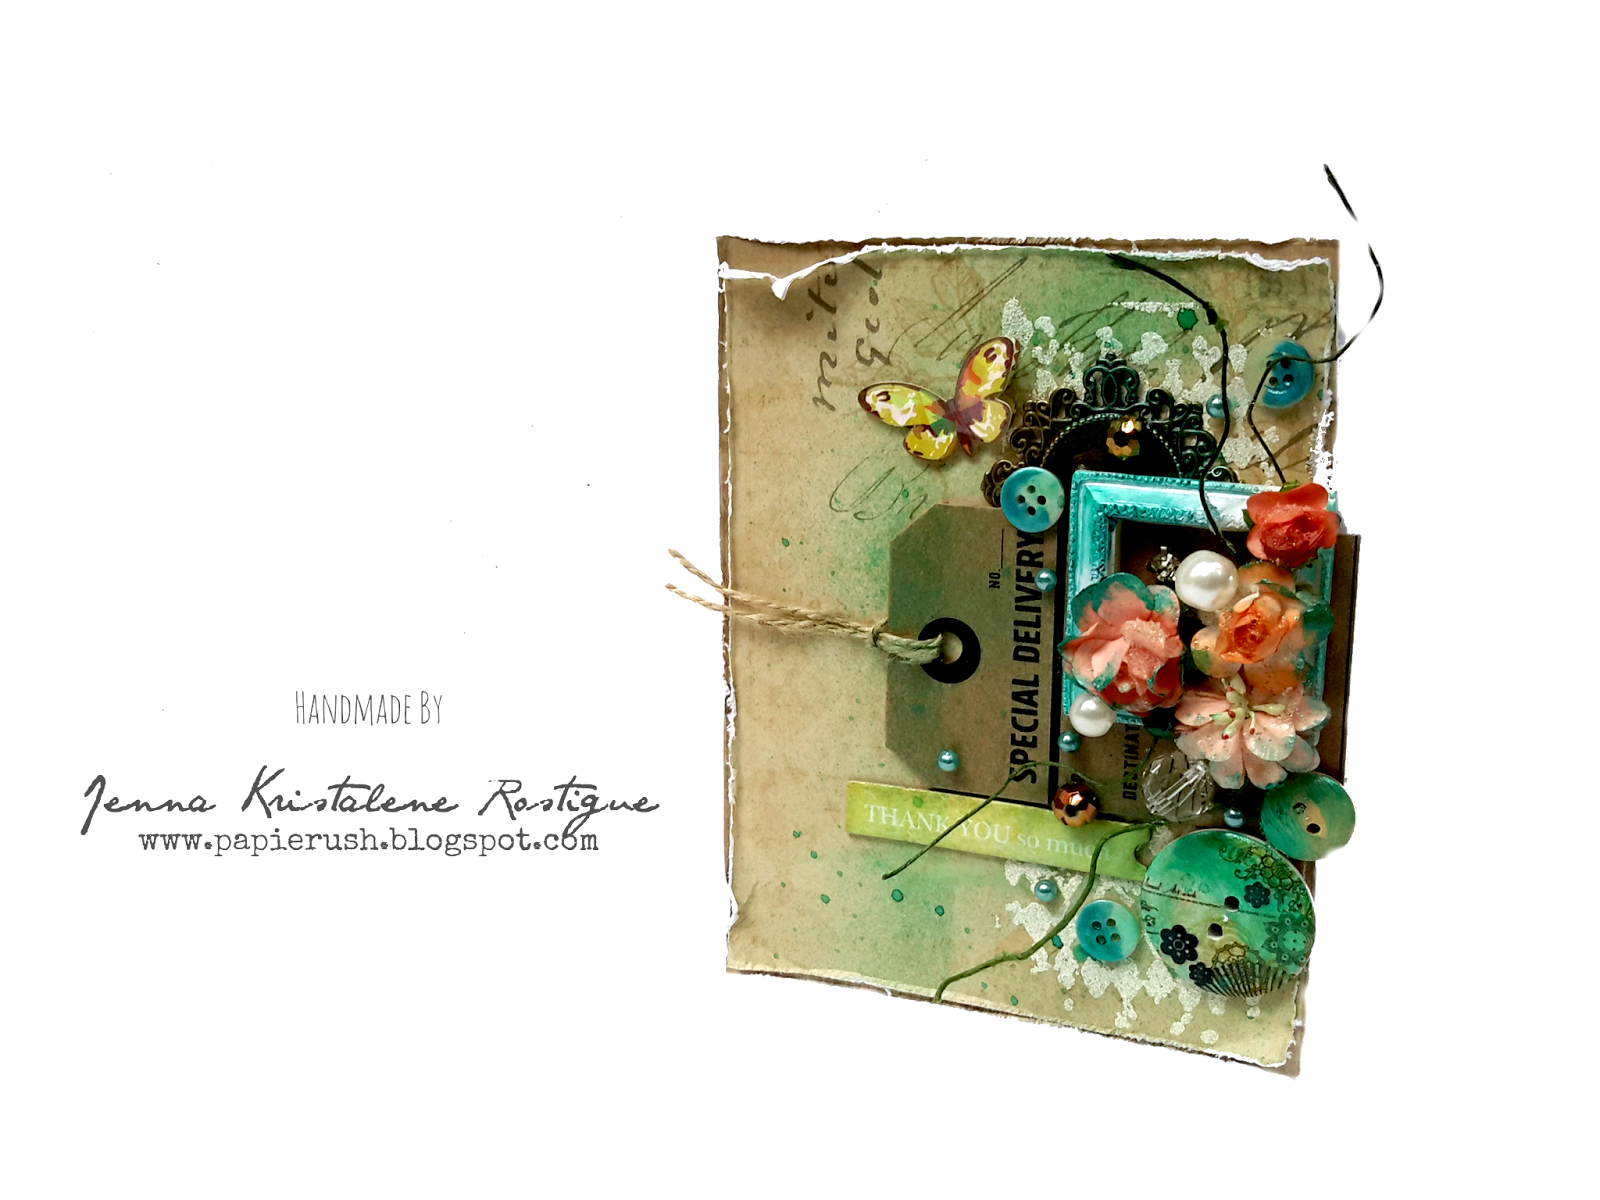
This is not what I had in mind when I was picturing out how the card would look like, but as I was making it, things started to happen. Hah. It was supposed to be orange and blue, but it turned out to be green instead of blue. I can't figure out how that came to be. I still had fun making it though. It is a little bit weird, but I think it is okay.


CARD# HPJ-2016-01: Thank You So Much 


I distressed the papers from the Tim Holtz paper stash. I stamped on the surface and embossed the image using weathered white embossing powder. After which, I adhered the embellishments. I added glass bead medium for texture glazed the embellishments. I sprayed glimmer mist as an afterthought. Voila! There goes my thank you card.

MATERIALS AND TOOLS USED: Bevania Splendorgel White, Eno Greeting 8"x8" paper pad Comfortable Afternoon, Papemelroti Tag, chipboard sticker, Eno Greeting 3D sticker, Eno Greeting resin embellishment, buttons, paper flowers, beads, self-adhesive crystal, Kaisercraft Clear Stamps Diamonds, Ranger Archival Ink Jet Black, Ranger Embossing Powder Weathered White, Ranger Heat It Tool, Tattered Angels Glimmer Mist Bahama Blue, FolkArt Acrylic Paint Emerald Green, Stanley Glue Gun 

2. Blank Cards
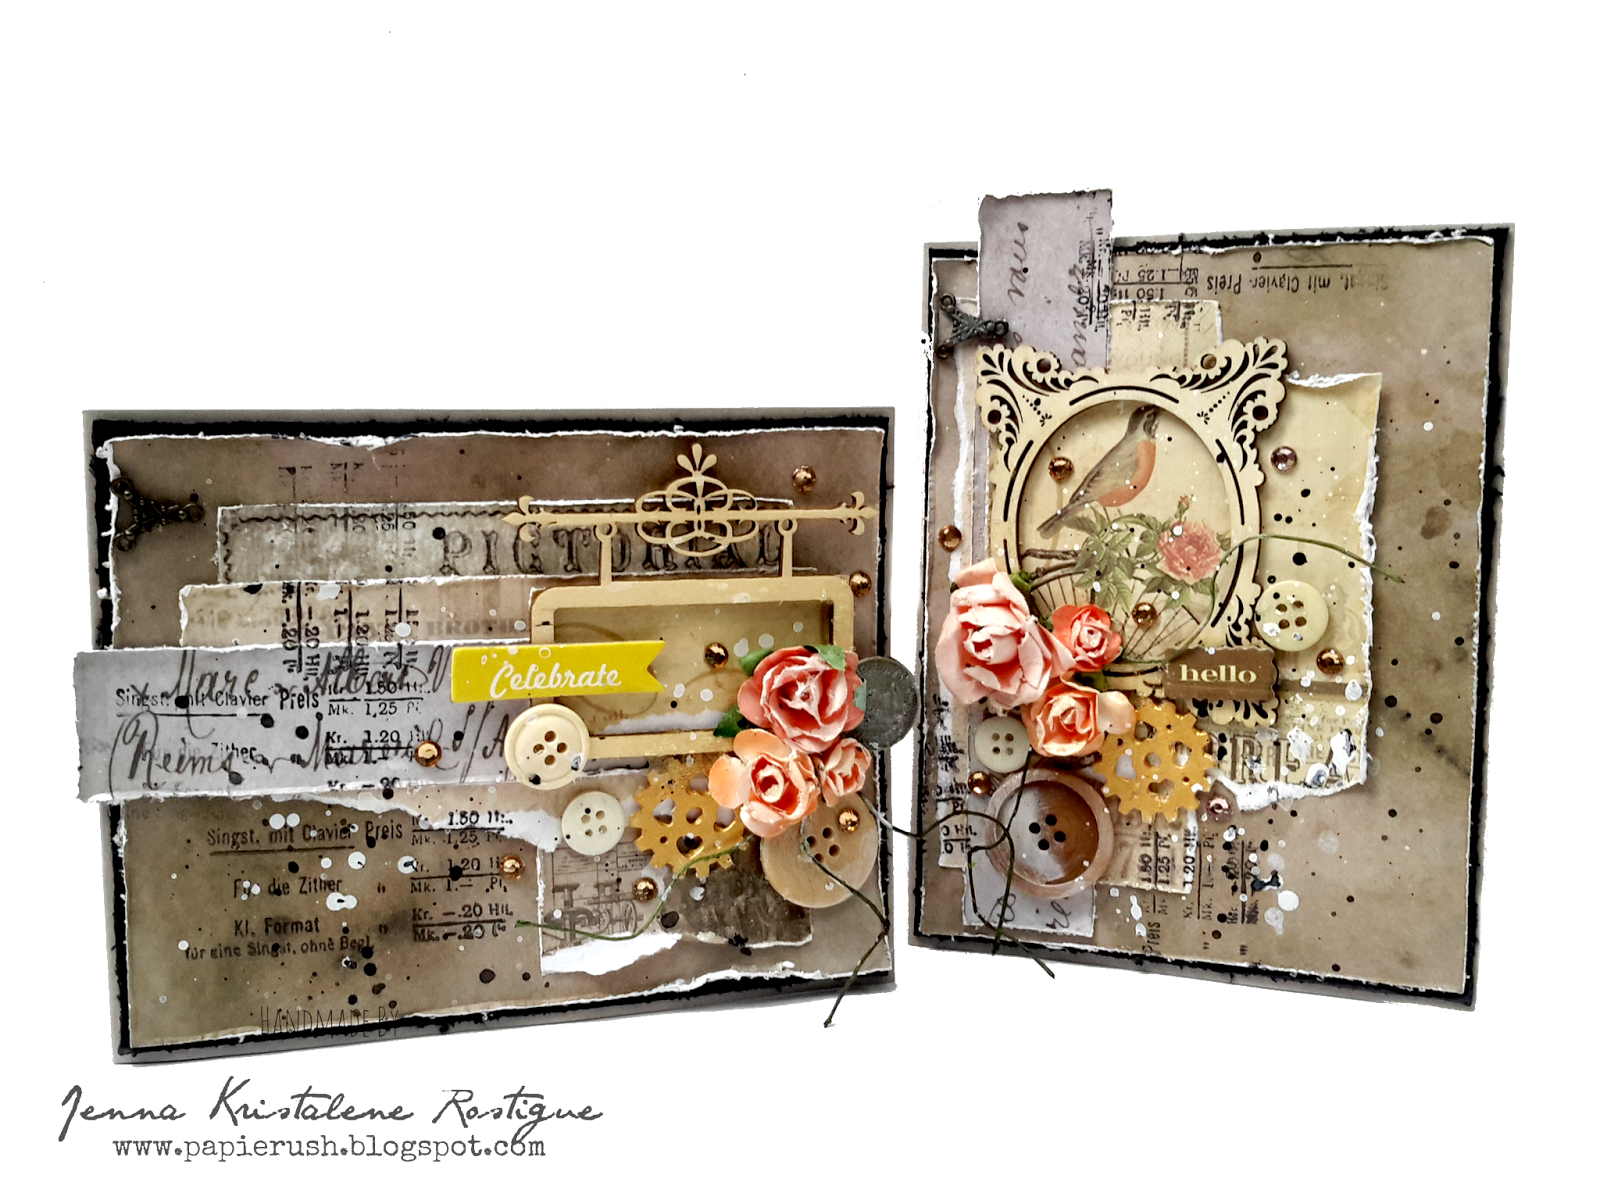
I made a set of blank mixed media cards which she can give to her friends on their birthday or to just say hi. I actually did a little experimenting on these cards. I changed the process which I usually follow when I make mixed media cards. I tried to mimic Elena Morgun's way of making her cards. Her process is great, but I think I will just stick to mine. It felt a little awkward and weird. I am more comfortable with how I do things, but I will definitely use some of her techniques like using chipboard for added dimension and completing the front of the card before adhering it onto the card base. I love her works. I wish I could be half as good as her.
Basically, I made the cards using similar materials. I just changed the layouts and the sentiments.


For each card, I layered several bits of patterned paper and topped it with various embellishments. I splattered some paint over it to make it more interesting and of course I added a couple of crystals because they are one of my staple supplies in making cards. Heh.
CARD# HPJ-2016-02: Hello
CARD# HPJ-2016-03: Celebrate


CARD# HPJ-2016-04: Enjoy


CARD# HPJ-2016-05: Birthday Wishes


MATERIALS AND TOOLS USED: Rives Board Paper Tradition Black, Moods Board Paper Stormy Grey, Tim Holtz Paper Stash 8"x8" Miscellaneous and French Industrial Revolution, printed texts, Eno Greeting Wooden Flourishes, paper flowers, metal charms, beads, self-adhesive crystals, buttons, brads, shrink plastic embellishments, Eno Greeting 3D stickers, Prima Marketing Clear Stamps Vintage Vanity Musica, Bo Bunny Clear Stamps Sentiments, Ranger Archival Ink Jet Black, The Crafter's Worshop Mini Stencil Chicken Wire Reversed, Golden Light Molding Paste, Golden Glass Bead Medium, Golden Soft Gel Medium, Pebeo Gesso, Reeves Acrylic Paint Mars Black, Ranger Embossing Ink Pad, Ranger Embossing Powder Super Fine Black, Ranger Heat It Tool, Stanley Glue Gun

3. Tags
I love how the Christmas tags I made for the Design Team last year turned out and I wanted to use the same principle in making another set. Here is what I came up with. (Sorry for the stenciled part. I must have overheated the molding paste. TT.TT.)


TAG# HPJ-2016-01: Cherish


TAG# HPJ-2016-02: Remember

TAG# HPJ-2016-03: Moments


TAG# HPJ-2016-04: Memories


MATERIALS AND TOOLS USED: DCWV 12"x12" Chalkboard Stack, All About Scrapbooking 12"x12" paper, printed text, Eno Greeting Wooden Flourishes, paper flowers, metal charms, buttons, beads, The Crafter's Workshop Mini Stencils Art Is, Brocade and Chicken Wire Reversed, Prima Marketing Stencil Harlequin, Golden Light Molding Paste, FolkArt Metallic Acrylic Paint Blue Topaz and Pearl White, Ranger Embossing Ink Pad, Prima Marketing Clear Stamps Vintage Vanity Musica, Ranger Embossing Powder Weathered White, Ranger Crackle Paint Rock Candy, Golden Glass Bead Medium, micro pearls, Golden Soft Gel Medium Gloss, Stanley Glue Gun

P.S. For some reason the color of the text would not change to black no matter how many times I try so please bear with it. I'll figure something out later. Also, I have yet to add the paper clips, bookmarks and altered box. I will post them as soon as I finish editing the photos. Thanks for looking today! Have a great week!