Hello guys and gals! I’m so sorry for the late post. I intended to
show you another project for Bee Happy Crafts DT yesterday, but I dozed off an
hour after getting home from work. Tsk. Here it is.
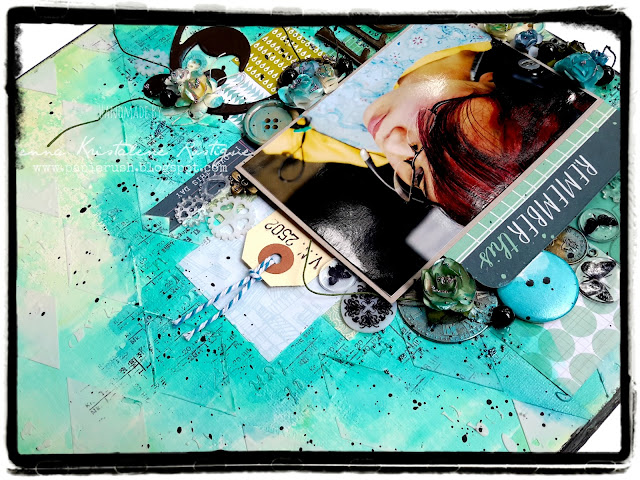
I was supposed to make a different project over the weekend, but I couldn't take my mind off a green and blue based mixed media canvas. So, I worked on it first. It was inspired by a project Elena Morgun made for Finnabair CT. You can find the video on her Youtube channel Elena Morgun. I tried the techniques she used and I was really happy about it. I didn't do some parts from her video tutorial since I didn't have the supplies, but I think it still looks fine. What do you think? (Don't mind my photo. Since I couldn't let go of the idea of starting the canvas, I just chose a picture from the very few printed ones that I have on hand. Excuse my face. Heh.)
 |
| I painted the chipboard with Burnt Umber acrylic colour. |
If you have or will check out Elena's video, she used soft gloss gel and silks to paint the base. Since I didn't have those, I used gesso and liquid pearls and then I sponged some olive ink from my ColorBox pigment ink pad over the surface. I cut pieces of designer papers from the Studio Calico sampler pack and adhered them onto the canvas with Modge Podge. I adhered a 3R photo (3.5" x 5") onto a slightly bigger cardstock. Before gluing it onto a thick chipboard, I placed a journaling card at the back of the photo mat. I cut out a sentiment from another journaling card. I then added the embellishments and stamped here and there. I brushed watered-down liquid pearls and metallic acrylic paint over a couple areas of the canvas including the top of the embellishments. I also added some micro pearls using Modge Podge. I splattered black acrylic paint onto the canvas and smudged some paint on the edges with my finger.
As a finishing touch, I added the embellishments that I made using shrink plastic. It's just so amazing looking at the little cogs and gears that came about by heating die cuts out of shrink plastic. They are just so cool! It was fun making them. I will definitely make some more. You will most probably see them on the current project that I am working on. I'm so excited. If only I could finish it now I could show you how it looks, but I would need another day or two to complete it.
So that was that—another mixed media canvas done. I hope to finish the mini that I am currently working on. Do stop by in a few days to check it out. Thank you for looking today!
MATERIALS AND TOOLS USED: Conda 12" x 12" Canvas, Moods Board Paper Storm Gray, Best of Studio Calico Sampler Pack, Ink Rose Albums Made Easy Journaling Cards, tag, Rouge de garance chipboard embellishments Passiflore, American Crafts Thickers, paper flowers, metal charms, pearls, buttons, string, baker's twine, shrink plastic, Pebeo Acrylic Colour Burnt Umber, Ranger Liquid Pearls Peacock, Mint Green and Petal Pink, FolkArt Metallic Acrylic Colour Blue Topaz, Reeves Acrylic Paint Mars Black, Reeves Gesso, Modge Podge Classic Matte, Elmer's White Glue, micro pearls, Ranger Archival Ink Jet Black, ColorBox Cat's Eye Queue Pigment Ink Pad Olive, Kaisercraft Clear Stamps Butterfly and Botanical Odyssey, Prima Marketing Clear Stamps Vintage Vanity, Prima Marketing Stencil Harlequin, Golden Molding Paste, Sizzix Bigz Die Love Gears, Cuttlebug Machine V2, Ranger Heat It Craft Tool, Stanley Glue Gun


No comments: