


Hi there! I’m back! I had wanted to write about the latest trishutter card that I made last week, but unfortunately our internet connection was down. It was not until yesterday that it finally got to work. How have you all been?
If you’ll ask me, I’m doing fine. I met some of my high school
friends last Saturday and I got to chat with them for a couple of hours. The
one who commissioned the card above is also a high school classmate who happened
to be in the metro during the time we had the small get together. I had no idea
she was here at all. I thought she was in the province so I had planned on
shipping the card to her there. Ooh. She should have said so and had come with
us so I could have handed it to her just like what I did with Karisse’s cards.
But then again she had some other plans with her brother so she did not catch
up with us.
Anyway, this is a birthday card (obviously! Hehe.) She couldn’t
decide at first what it shall be, but later on she said she wanted a trishutter
with a matching box. She wanted it to be vintage and instead of the more popular
color palette from my previous commissions, black and white, she wanted it
brown. Thank God for that. I am running out of black patterned paper and the
online stores do not have much paper pads nor kits with this color palette.

The card measures 4 ¼” x 6” when closed.

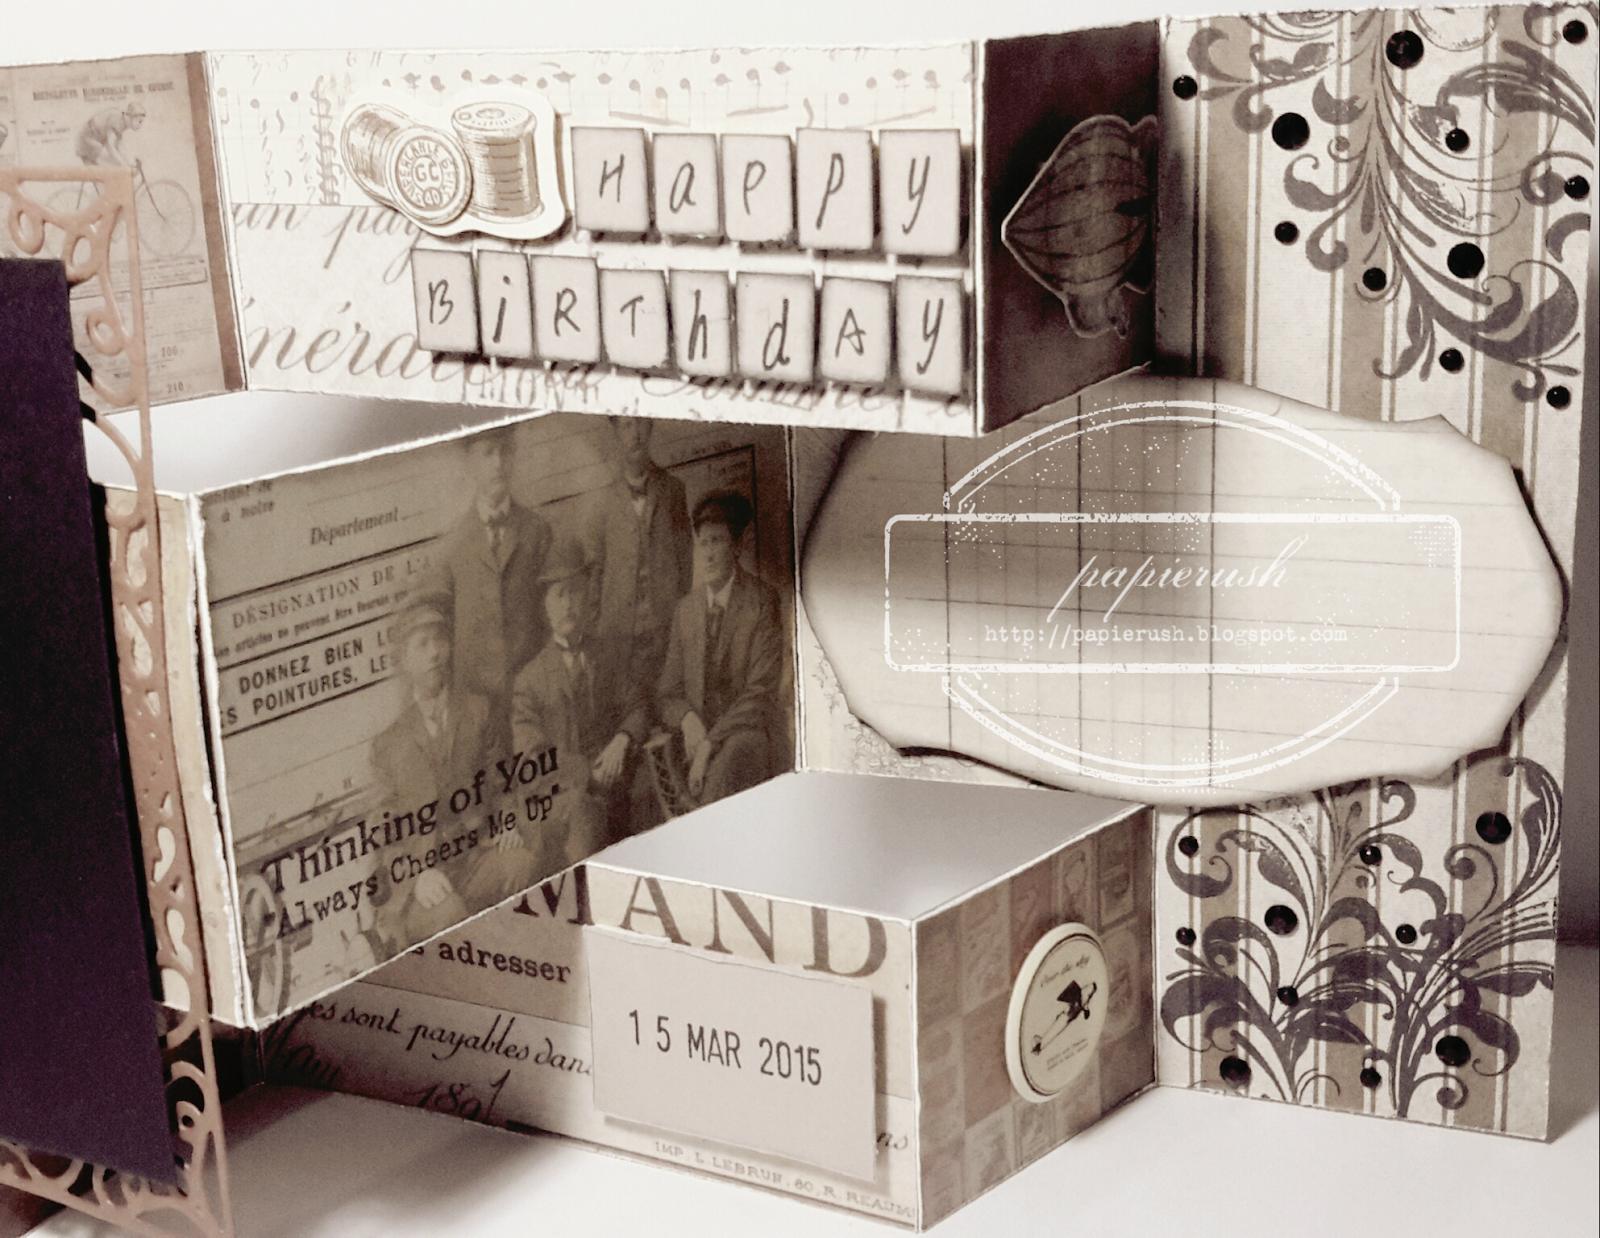


I made a slight variation on the layout of the panels. Instead
of putting the message space at the center panel, I placed it over two panels
on the right.
Like my other trishutter cards, I used molding paste, die
cuts, stamps and what not in decorating the background. I didn’t use that much
embellishments since the papers already give out so much flare.
Oh. And before I forget, you must have noticed the cardstock
that I used for the base. It is the same as the one I used on the previous card—the
stormy
gray board paper from Moods.
I really love this paper!


As for the box (excuse the number of pictures. I used different designer papers for the panels and I wanted to show how each side looked like.), I covered the lid with bits of designer paper
and adhered a tag with a sentiment on it. She will tie it with a length of
brown cotton tape that I will be including in the set.
I hope Kim likes it and the recipient would appreciate it.
Thanks for stopping by today! Have a great week!
MATERIALS
AND TOOLS USED: Moods Board Paper Stormy Gray, Tim Holtz Idea-Ology Paper Stash
12x12 paper pad French Industrial Revolution, Elit Specialty Board Paper
Buffalo Brown, Rives Board Paper Tradition Black, self-adhesive crystals, puff
sticker, Golden Molding Paste, The Crafter’s Workshop Stencil Mini Window
Screen, Kaisercraft Clear Stamps, Bo Bunny Clear Stamps Flourishes & Such,
Inkadinkado Clear Stamps Inspirational Lift, rubber stamps, Ranger Archival Ink
Jet Black, Beauty Pigment Ink Black, Spellbinders Shapeabilities Fancy Framed Tags One,
Cuttlebug Machine V2
No comments: