


Hi there! I have wanted to show you the mini that I made for my friends who got married last November 2nd, but I had been so busy. I don't like how the box turned out, but I love the mini. I actually want it for myself. Heh.


Anyway, I made a walk through video of it (Thanks to my sister who recorded the video while I flipped through the pages.) You can find it on my Flickr account.
Just like the one that I made for Ate Nadia (If you haven't seen it, you can check it here.). I employed the same techniques that Cathy McGrath utilized on her video tutorial. I got to use the Martha Stewart Edge Punch from the package! The edges of the pages are so pretty because of it. I still followed Cathy's ideas on how to make the pages interactive, but I decorated mine to be more like me. I used light molding paste which I must say is such a cool product. It is very light yet it builds texture and dimension. Awesome!
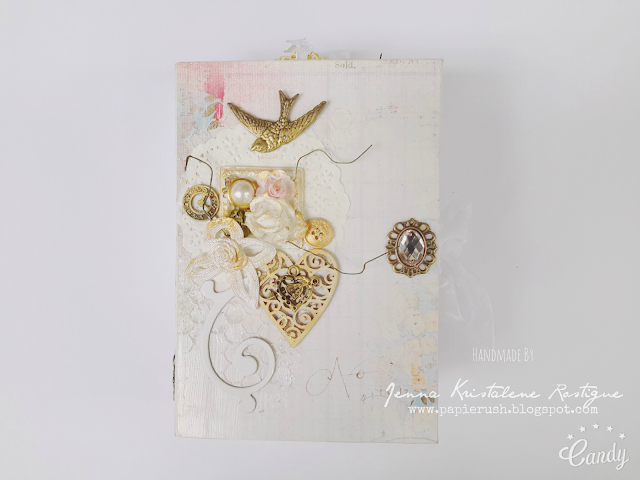
For the cover, I cut a piece of chipboard and adhered a length of thick double sided tape on the folds and covered the surface with tissuestock. I then coated it with Modge Podge. After drying, I covered the base with one of my wrapping papers (the white side up) and again coated the whole thing with Modge Podge. Then I added the patterned papers and brushed another coat of Modge Podge. You see there are a lot of layers of paper and Modge Podge.


I did not embellish the front heavily like I usually do with my mixed media projects.
Instead of decorating the pages with the pockets like Cathy did, I left them alone. I placed embellishments on the pages with photo mattes. Some of the embellishments were made from shrink plastic (the small love gears) left over from the first package I received for the Design Team.

I made photo matte inserts out of the pale cream cardstock and stamped on them using distress ink. For the pull tab, I made several dieccuts using the Die-namics Mini Doilies dies which also came in the first DT package.
There are tags on all the pages. They are from the paper pad that I used for the mini. I just tied lace and rickracks on all of them to add more interest.


Before we go to the box, there is one other part of the mini that I need to talk about. Okay. That would be the detachable charm that goes on the spine of the mini. You have seen it a couple of times in my previous projects. It is one of the staples of minis. I put together several metal charms and beads from my stash to make it.


Anyway, I made a walk through video of it (Thanks to my sister who recorded the video while I flipped through the pages.) You can find it on my Flickr account.
Just like the one that I made for Ate Nadia (If you haven't seen it, you can check it here.). I employed the same techniques that Cathy McGrath utilized on her video tutorial. I got to use the Martha Stewart Edge Punch from the package! The edges of the pages are so pretty because of it. I still followed Cathy's ideas on how to make the pages interactive, but I decorated mine to be more like me. I used light molding paste which I must say is such a cool product. It is very light yet it builds texture and dimension. Awesome!
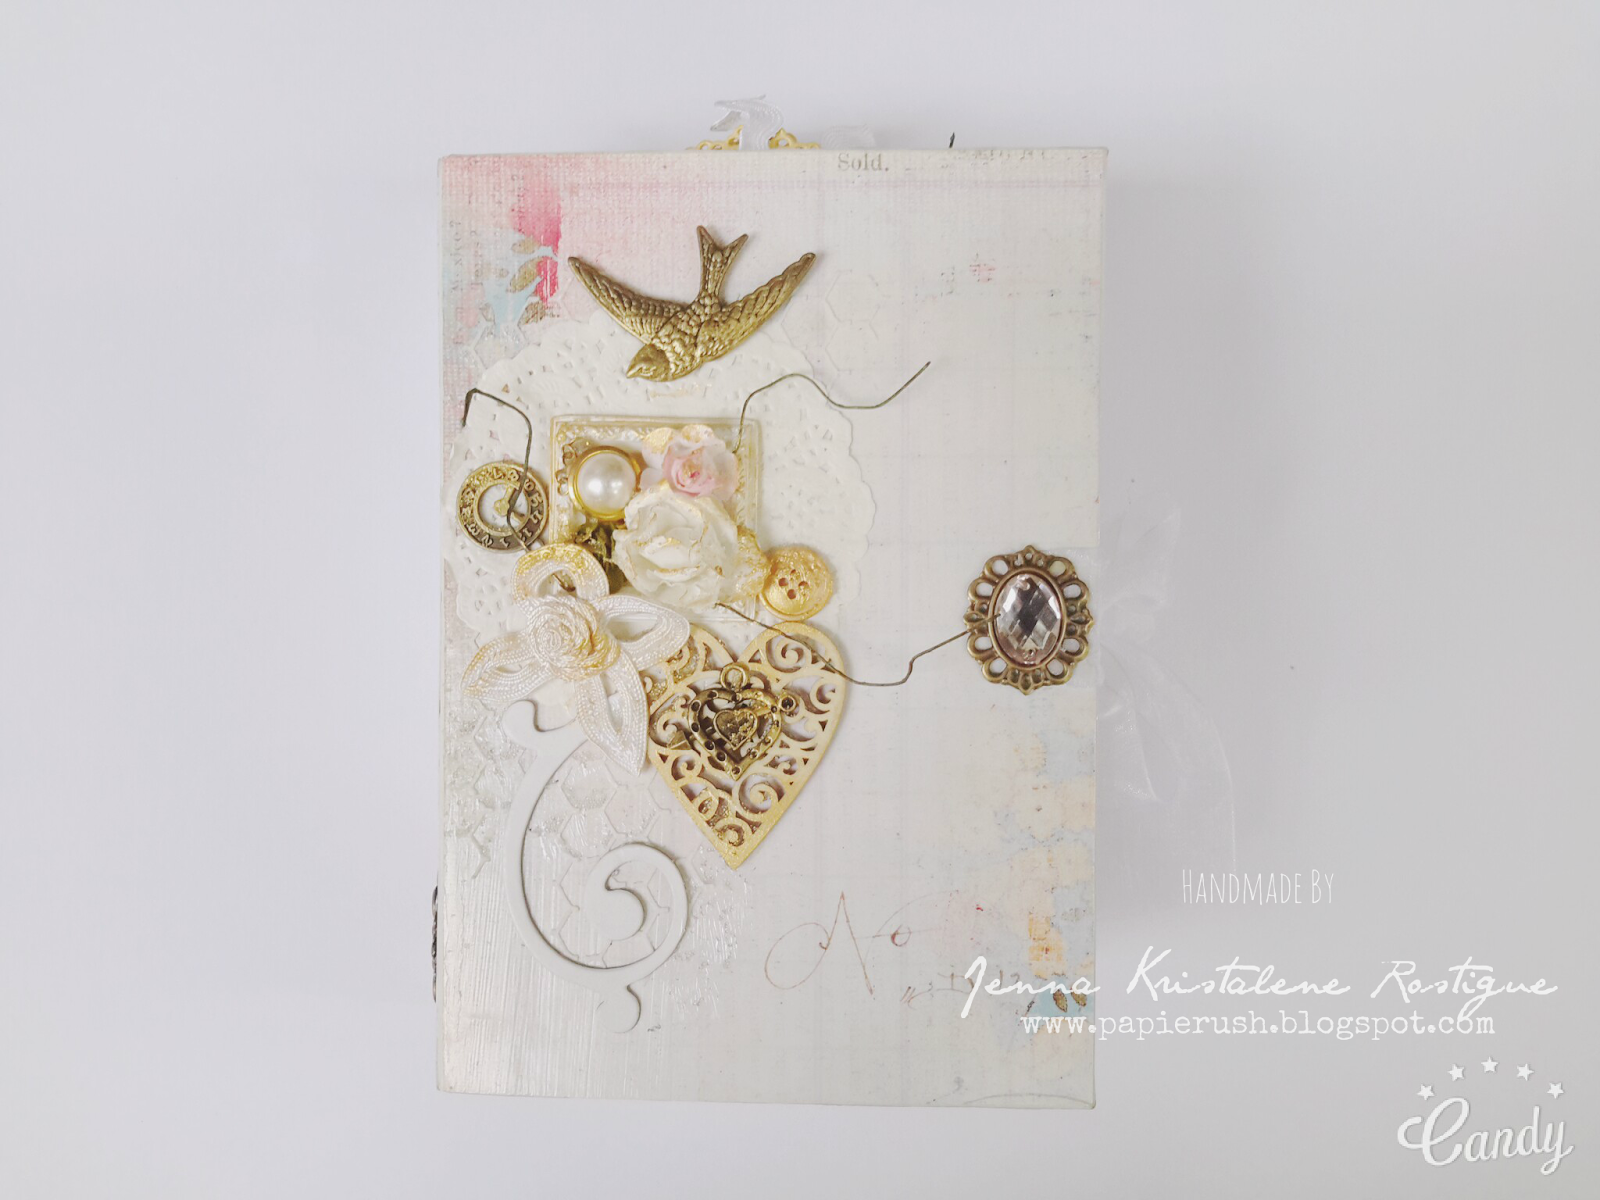
For the cover, I cut a piece of chipboard and adhered a length of thick double sided tape on the folds and covered the surface with tissuestock. I then coated it with Modge Podge. After drying, I covered the base with one of my wrapping papers (the white side up) and again coated the whole thing with Modge Podge. Then I added the patterned papers and brushed another coat of Modge Podge. You see there are a lot of layers of paper and Modge Podge.


I did not embellish the front heavily like I usually do with my mixed media projects.
Instead of decorating the pages with the pockets like Cathy did, I left them alone. I placed embellishments on the pages with photo mattes. Some of the embellishments were made from shrink plastic (the small love gears) left over from the first package I received for the Design Team.

I made photo matte inserts out of the pale cream cardstock and stamped on them using distress ink. For the pull tab, I made several dieccuts using the Die-namics Mini Doilies dies which also came in the first DT package.
There are tags on all the pages. They are from the paper pad that I used for the mini. I just tied lace and rickracks on all of them to add more interest.


Before we go to the box, there is one other part of the mini that I need to talk about. Okay. That would be the detachable charm that goes on the spine of the mini. You have seen it a couple of times in my previous projects. It is one of the staples of minis. I put together several metal charms and beads from my stash to make it.

I haven't met with the couple after the wedding ceremony so I haven't given this yet. I am still thinking of changing the box because I really do not like how it turned out. I haven't made another one yet since I cannot find the right box. Tsk. I thought I had found it, but when I came home and saw the old box, I realized that it was too big. Hmf. Oh well, I will just try something else.
By the way, the photo above is how I was to package the gift. I will cover the box with white organza. That is, if I have the right box. Tsk. I will make an update here what the final packaging would be. I hope you visit my blog from time to time. Thank you for stopping by today!
MATERIALS AND TOOLS USED: Paper bags, Elit Board Paper Vellum Pale Cream, Chipboard, Eno Greeting Paper Pad 12"x12", Daisy D's 12"x12", Martha Stewart Edge Punch Floral Lace, Bo Bunny Clear Stamps It Is Written, Kaisercraft Clear Stamps Botanical Odyssey, Ranger Archival Ink Jet Black, Distress Ink Mini Bundled Sage, Iced Spruce, Crushed Olive, Tattered Rose, Worn Lipstick and Ripe Persimmon, Eno Greeting Resin and Wood Embellishments, Eno Greeting 3D embellishments, Rouge de garance Chipboard Embellishments, metal charms, shrink plastic embellishments, self-adhesive crystals, pearls, beads, paper flowers, paper doily, organza ribbon, lace trimmings, rick racks, Reeves Poster Color Gold, Elmer's White Glue, Stanley Glue Gun, Ranger Heat It Tool, Spellbinders Nestabilities Captivating Squares and Fleur de Lis Squares, Die-namics Mini Doily Circles, Spellbinders Shapeabilities D-Lites Fancy Framed Tags One, Cuttlebug Machine V2
By the way, the photo above is how I was to package the gift. I will cover the box with white organza. That is, if I have the right box. Tsk. I will make an update here what the final packaging would be. I hope you visit my blog from time to time. Thank you for stopping by today!
MATERIALS AND TOOLS USED: Paper bags, Elit Board Paper Vellum Pale Cream, Chipboard, Eno Greeting Paper Pad 12"x12", Daisy D's 12"x12", Martha Stewart Edge Punch Floral Lace, Bo Bunny Clear Stamps It Is Written, Kaisercraft Clear Stamps Botanical Odyssey, Ranger Archival Ink Jet Black, Distress Ink Mini Bundled Sage, Iced Spruce, Crushed Olive, Tattered Rose, Worn Lipstick and Ripe Persimmon, Eno Greeting Resin and Wood Embellishments, Eno Greeting 3D embellishments, Rouge de garance Chipboard Embellishments, metal charms, shrink plastic embellishments, self-adhesive crystals, pearls, beads, paper flowers, paper doily, organza ribbon, lace trimmings, rick racks, Reeves Poster Color Gold, Elmer's White Glue, Stanley Glue Gun, Ranger Heat It Tool, Spellbinders Nestabilities Captivating Squares and Fleur de Lis Squares, Die-namics Mini Doily Circles, Spellbinders Shapeabilities D-Lites Fancy Framed Tags One, Cuttlebug Machine V2


