Monday, February 23, 2015

ALTERED BOX


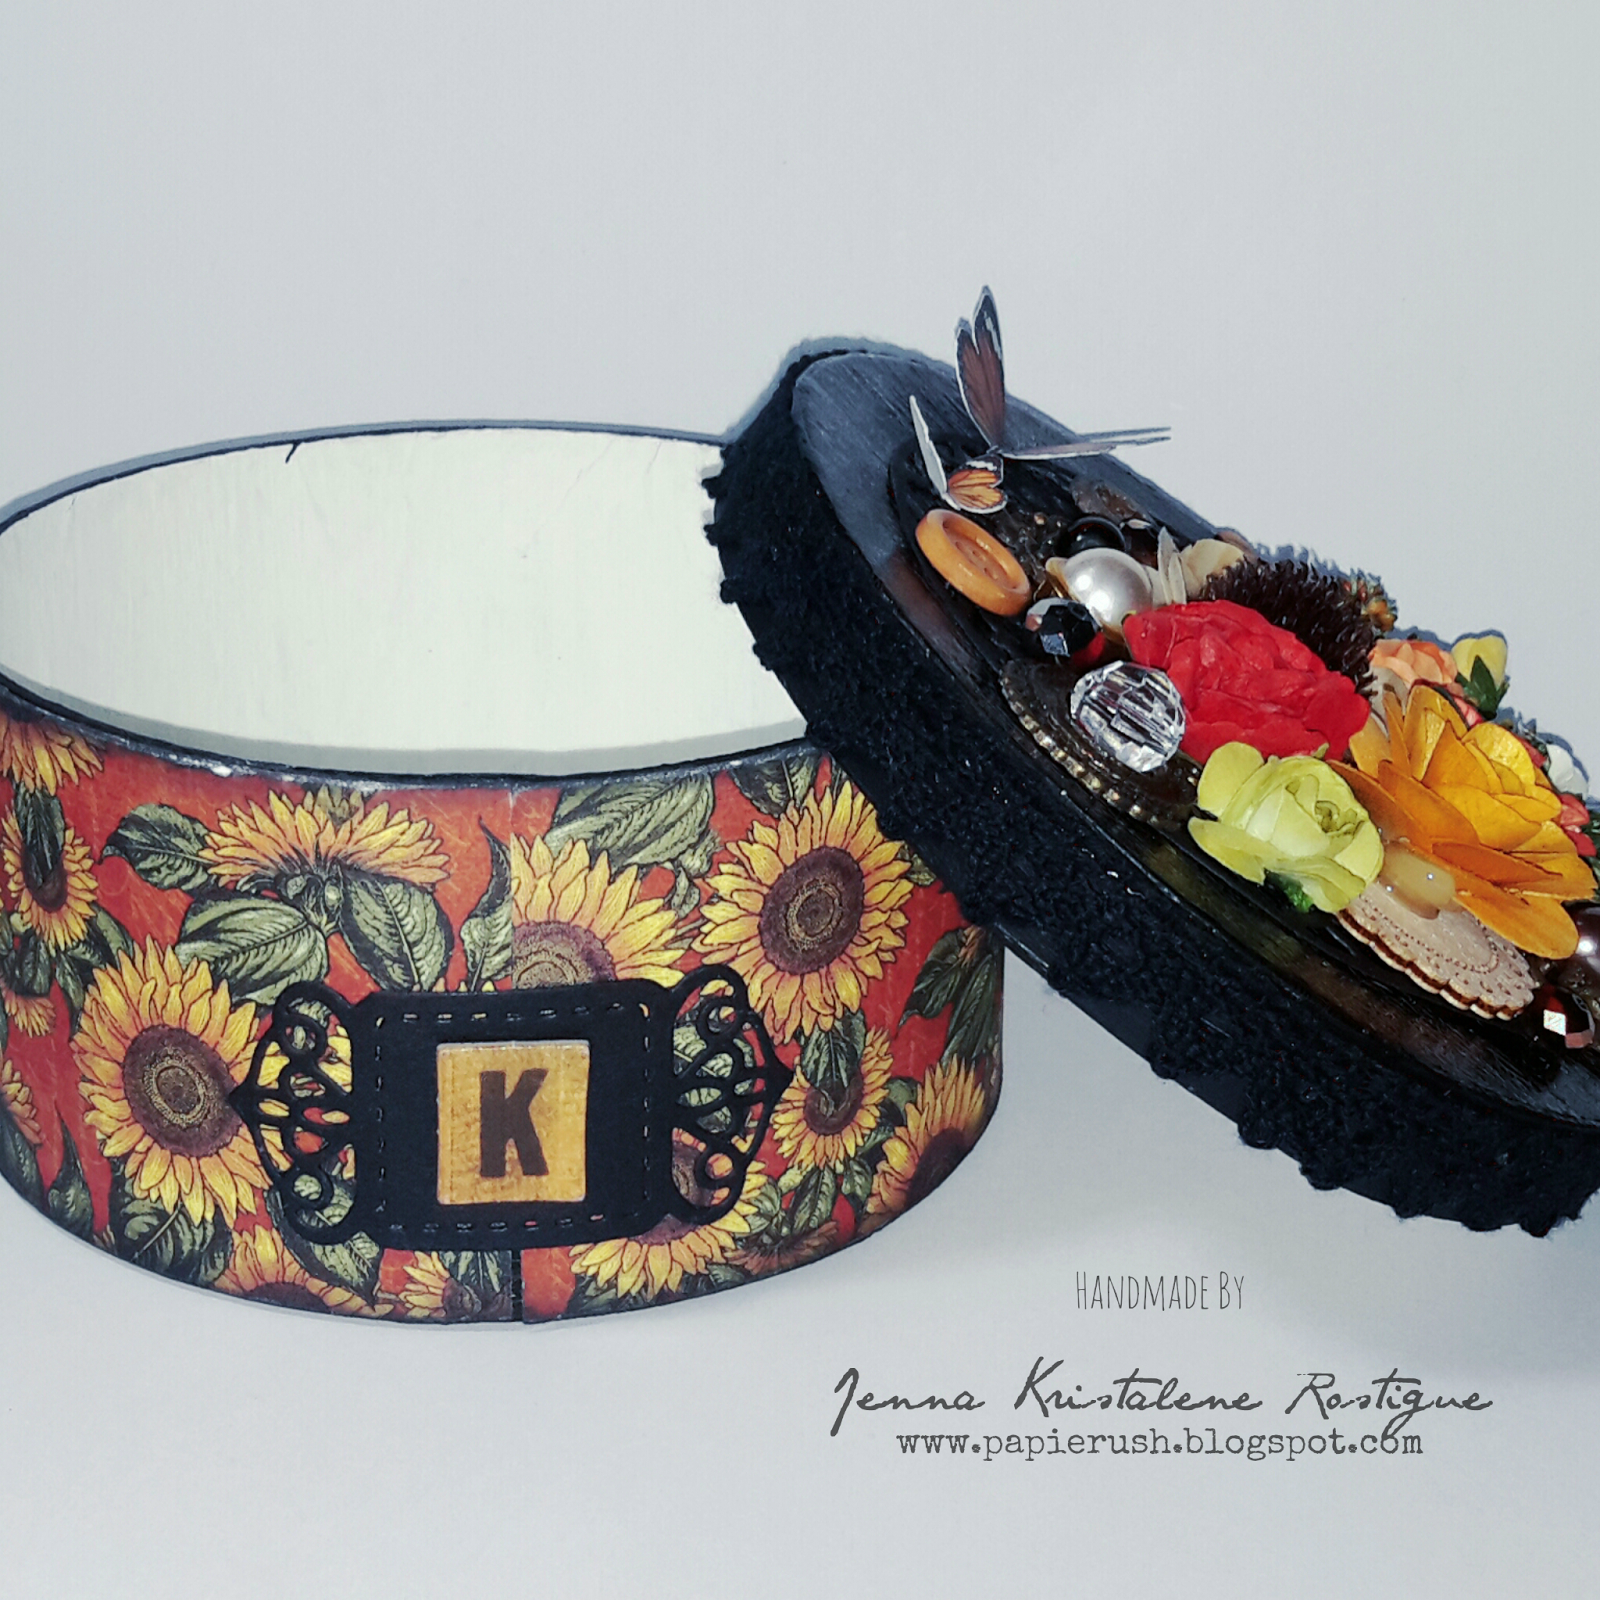
Hi everyone! Welcome to today’s post. It is all about the altered box that I finished the other day. I made this for a fellow crafter who I will be meeting next week. I am excited to meet her. She is actually the first ever crafter that I will be meeting personally. I don’t go out often and I only mostly interact with the crafting community online. So this meeting will really be memorable and fun since we will be looking for supplies in the shopping mecca of Manila. I can’t wait to see all those supplies out there!

Oops. Sorry. I got carried away. Let me continue with the altered box. Heh. I have these medium-sized kraft boxes from one of my divi trips two years ago. I had intended to use them to hold Christmas gifts that particular year, but I only used two of the twelve that I bought. I used six of them to store dried flowers and seeds from three bags of potpourri I got from Papemelroti and the rest were packed away at the top of my closet.

I thought of giving her a small gift when we get together, something that I made. I figured that I could make book page embellishments and paper clips like the ones I made for the guestbook commission. With that in mind, I would need something to hold all those small things and tada! What about a box? an altered one? I could surely make one since I’ve already something similar before. Of course I then remembered my stash of round boxes waiting to be noticed. Yay!


I covered the inside of the box with several coats of gesso as well as all the parts of the lid. After the inside part dried, I gessoed the bottom of the box and the rim. Then I painted the lid and the bottom of the box with black acrylic paint. I left the inside white.  

I adhered two strips of patterned paper (8” in length each) onto the outer part of the box and sanded the edges. I inked them afterwards.


As for the lid, I coated the top with crackle paint and affixed a length of lace trimming around the side. I then proceeded to decorate. I added a die cut with an alpha tile onto the box for a finishing touch. I just love decorating. I can’t wait to start my art journal! Of course I am more excited of decorating the cover. Haha. I hope I would be able to do it soon. Gah. I’d really love to have an art journal of my own. I’ll post some photos as soon as I finish it.

That was another fun project. I hope she likes the box and the fufus inside. Thank you for stopping by! Have a wonderful week!

P.S. I forgot to show the little embellishments I made to go inside the box.


I was supposed to put a tissue paper inside before placing the goodies, but the clips just wouldn't fit so I left it as it is.


I ran out of the bigger silver paper clips so I just used the small ones covered with vinyl. Gah. I am enjoying making cutesie paper clips. I'll try my hand on small origami flowers for the embellishment some time soon. For returning clients, I will be giving a set for free (instead of the card/bookmark since I already gave them one when they ordered the first time). I'll make other kinds of freebies as well. Thanks again for looking!

MATERIALS AND TOOLS USED: Kraft box, Graphic 45 8x8 French Country Collection, Rives Board Paper Tradition Black, Tim Holtz Idea-ology Alpha Tiles, paper flowers, paper ferns, Eno Greeting Wooden Embellishments, wooden flowers, metal charms, beads, buttons, Ranger Distressed Crackle Paint Rock Candy, Marie's Gesso, Pebeo Acrylic Colour Mars Black, Stanley Glue Gun, Beauty Premium Pigment Ink Black, Spellbinders Nestabilities Splendid Circles and A2 Card Creator Tranquil Moments, Cuttlebug Machine V2 (For the loose embellishments: Bevania Splendorgel Board Paper Ivory, book pages, Ranger Archival Ink Jet Black, Ranger Distressed Crackle Paint Rock Candy, Kaisercraft Clear Stamps Botanical Odyssey, Bo Bunny Clear Stamps Flourishes and Such, Inkadinkado Clear Stamps Inspirational Lift and Bird House, paper clips, self-adhesive crystals, black felt, Stanley Glue Gun, glue stick)


Sunday, February 15, 2015

COMMISSION #3: Once Upon A Time

Hi! The commission I received this time was a guestbook/ wish book for a first birthday. I was excited about this project because it was the first time that I received a custom order for a guestbook and I rather love the idea of making something for a sweet girl’s first birthday.

On the onset, I thought the guestbook should be in line with the Little Red Riding Hood theme of the party so I started with a cover that has a subtle background, lace trimmings for the spine, felt doll and embellishments, etc., but after talking again to the client, I found out that she wanted it to be more of a storybook and she’d like earth colors. These got me to thinking why not make it vintage and a little mixed media to boot. The second time around, here is what I came up with:


I forgot to mention that I also thought of making it some sort of mini album as well so they can tuck several photos, doodle stuff, write messages. It would be a perfect keepsake for the occasion. Thus, the pockets, sleeves, tags and whatnots.


I was inspired by the works of Michelle Mooney. She is such a talented and awesome person to have created so many beautiful art journals, mini albums and all sorts of other things. You can check out her videos on YouTube under The Paper Addiction. I got the idea for assembling the pages from Brenda Bliss.  I so love how generous they are for sharing their talents and their tricks on making these wonderful projects.

Going back to the commission, I made the cover to resemble more of my style—layers, texture, dimensions and a lot of details. I covered the chip board base with patterned papers and added lace trimmings at the spine to cover up where the papers meet. I stenciled on the bottom right corner of the cover with molding paste and dabbed metallic ink onto the dried surface. I then added the embellishments- an assortment of beads, buttons, crystals, pearls, paper flowers, etc. I printed the title onto a patterned paper that complements the background and cut out the label outline. I attached a jump ring on the lace trimming before adhering it onto the spine of the cover so I could later on latch a set of charms there. I love the charms which I made from a couple of jump rings, chains, beads and metal embellishments. I wanted to put an eyelet on the spine, but I didn't have an eyelet setter tool. I couldn't find my screwdriver bits so I just made use of a jump ring.


Before adhering the pages onto the spine, I placed a length of twill ribbon for the bookmark. I decorated one end with beads and a charm.


There is nothing going on at the back of the book so let us go take a look inside. I made a video of all the components of the project. Here it is.


I covered the back of the front cover with another patterned paper. I added a pocket for tags or photos (whichever the client would like to put in there). I left the pages blank except for occasional sleeves and pockets. They would have plenty of space to write and put pictures. The back of the back cover I made pockets as well.


As for the embellishments-random flowers, butterflies and paper clips—I thought it best to not put them inside myself. It would be up to the client to decorate the pages to her preference.


What else is there? Hmn. There are big and small tags which I stamped with a couple of images. I tied a ribbon in some of them. Ooh. And I decorated a pen to go with the book.

That was an awesome project. I’m starting to get new addiction-making mini albums! Remember the gift I made for Miss K’s wedding? I am thinking of changing the photo folio into a mini album. I don’t quite like how the folio turned out. Gad. It was the second folio that I made, but it still looked off. Gah. I’ve wasted a pad of Graphic 45 patterned papers. Tsk. I will post the final boxed mini album as soon as I get it done. I still have some decorating to do on the pages.

Thank you for stopping by today! Have a great weekend!

MATERIALS AND TOOLS USED: (FOR THE COVER:  Chipboard #50, Tim Holtz Paper Stash 12x12 paper pad French Industrial Revolution, paper flowers, beads, pearls, self-adhesive crystals, rhinestones, buttons, metal charms, Eno Greeting Wooden Embellishments, brad, lace trimmings, jump rings, printed image, HP All-In-One Deskjet Printer, ink pad, double sided adhesive sheets) (FOR THE PAGES: Elit Board Paper Pale Cream, All About Scrapbooking 12x12 Timeless, Daisy D 12x12, , Tim Holtz Paper Stash 12x12 paper pad French Industrial Revolution, Papemelroti stationery pad, lace trimmings, ColorBox Cat’s Eye Queue Pigment Ink Brown, ribbons, Kaisercraft Clear Stamps Madame Boutique, Botanical Odyssey, Windsor, Bo Bunny Clear Stamps Flourishes and Such) (FOR LOOSE EMBELLISHMENTS: book pages, paper scraps, buttons, brads, craft scissors, black ink pad, Kaisercraft Clear Stamps Botanical Odyssey, Imaginisce Clear Stamps Bird House, Inkadinkado Clear Stamps Lift, Ranger Archival Ink Jet Black, Ranger Distress Crackle Paint Rock Candy, paper clips, pearls, Stanley Glue Gun, black felt